Choucroute-style Brussels Sprouts

Reliance Compost
Poor old Brussels sprouts, of all the veggies in the world, they really do have the worst rap. A mere mention of the word “sprouts” and most people visibly recoil and recall horror stories of being force-fed pallid, boiled-to-death sprouts at the hands of grandmothers. But we’re going to let you in on a little secret here, Brussels sprouts don’t have to taste like dirty dishwater or, excuse us, farts. In fact, they can be quite lovely when cooked properly, and taste very similar to cabbage, but with an overall nuttiness and freshness. When growing your own Brussels always bear in mind that they like fertile, well-drained, moist soils with plenty of organic matter.

The Brussels sprout is also very versatile, and can be stir-fried, blanched (NEVER boiled!), roasted, steamed or sauteéd and works well with most strong-flavoured ingredients, such as blue cheese, Parmesan, chillies, fish sauce and, as in this recipe, bacon! We’ve updated a classic French recipe which usually uses ham hock and cabbage. Instead, this recipe calls to render out bacon fat, cook the sprouts in that (with the addition of white wine and stock) and then serve with crispy bacon pieces. Make absolutely sure you don’t overcook the sprouts, as no amount of bacon can mask their sulphurous flavour!
Brussels
Choucroute-style Brussels Sprouts

Serves: 4
Difficulty: easy
Prep time: 10 minutes
Cooking time: 20 minutes

100 g bacon, preferably streaky or leg, cubed
olive oil
½ onion, very finely sliced
salt and pepper
50 ml white wine
½ C (125 ml) vegetable or chicken stock
300 g Brussels sprouts, halved
small handful of parsley, finely chopped


Place the bacon into a cold saucepan and place over a low heat. Leave for about 10 minutes until the fat has rendered out, then increase the heat slightly to crisp up the bacon cubes. Once crisp, remove the pieces from the pan. Lower the heat and add a little bit of olive oil to the bacon fat, then add the onion. Cook over a medium heat until the onion is completely soft.

Raise the heat again and add the white wine. Allow to reduce for a few minutes. Then add the stock you’re using and finally, the Brussels sprouts. Cook over a medium-high for about 10 minutes. You want the liquid to reduce and cook the sprouts but you still want them to retain their bright green colour, as well as a little crunch, so be careful not to overcook them.

When your sprouts are ready, add the bacon and the chopped parsley and stir once to combine. Turn out on onto a platter and serve immediately.

See more of our favourite seasonal winter veg recipes here!

Delicious produce is grown in healthy, living soil. #Harvesttotable series brought to you by Reliance Compost.

Reliance Compost

Celeriac ‘Annas’

Reliance Compost
Celeriac is a rather misunderstood vegetable. Lumpy and odd-looking, you’d hardly look at it and say “wow, celeriac, I’d like to eat you”. But, when faced with the intimidating celery-root, one must remember what mom used to say – never judge a book by its cover. Celeriac is actually quite delicious, and has an earthy, mild celery flavour. Generally you’ll find in supermarkets prepped and cleaned, but if not, it’s a simple case of trimming the root and peeling away the hard outer skin. It has a hearty, substantial, albeit sometimes woody, texture that means you can pretty much cook it anyway you please. Blanch, roast, pureé into soup, even fry, there’s nothing the celeriac can’t handle. If you’re thinking of planting your own (think of all the beautiful celery you’ll have too!), remember that celeriac loves cool weather, but full sunlight!

You don’t even have to cook it, a defining  feature of the classic French condiment celeri rémoulade, where sliced celeriac is mixed with an aïoli. In this recipe, we’ve played with an alternative to pommes Anna, a dish of sliced, layered potato cooked in large amounts (and we mean very large) of butter. Essentially, the celeriac has replaced the potato, which makes these great if you’re trying to give up potato for whatever reason. These are individual ‘Annas’ cooked in a muffin tin, but you could very easily make one large one and slice it when serving.
Celeriac
Celeriac ‘Annas’

1 kg celeriac (roughly two small bulbs or a single large one), peeled
300 g butter, melted
3 sprigs thyme, flowers removed
salt
Parmesan cheese
Preheat the oven to 180 ºC.

Using a mandoline or a very sharp knife, finely slice the celeriac. If making individual ‘Annas’, use a cutter to cut out the circles to fit into a muffin tin. Add the thyme and salt to the melted butter and mix together. Brush each muffin cup with melted butter, and layer the sliced celeriac, brushing with butter in between each layer. Keep layering and brushing with butter until the pile reaches the top of the pan. Brush once more with butter and sprinkle over a few thyme leaves, if you wish.  (Note: Alternatively, if you would like to make one large ‘Anna’, use a roasting tin and simply finely slice the celeriac as is, and follow the same buttering and layering process.)

Bake in the oven for about 25 minutes or until the celeriac is soft all the way through and the top is lightly browned. Remove from the oven and turn the oven grill on.

Top each Anna with a little grated Parmesan and place under the grill to brown and crisp up further. Remove carefully from the muffin pan and serve immediately.

See more of our favourite seasonal winter veg recipes here!

Delicious produce is grown in healthy, living soil. #Harvesttotable series brought to you by Reliance Compost.

Reliance Compost

Beef Short Rib Pies

Miele leaderboard-banner

Beef Short Rib Pies

In this day and age, it’s hard to find a good pie. They either have too much gravy or not enough meat. We prefer a pie that’s wall to pastry wall full of ridiculously tender meat with just a smidgen of onions for jammy effect. It takes a little longer than popping down to the local garage, but the results are well worth the effort. In this version we opted to use a Lancashire Hot Pot-style topping of crispy potatoes.

Serves: 6-8
Difficulty: moderate
Prep time: 1 1/2 hours
Cooking time: 5 hours

Beef Short Rib Filling
oil for frying
2 kg beef short rib
7 onions, sliced thick
3 garlic cloves, finely chopped
small handful of chopped rosemary
small handful of chopped thyme
500 ml beer
2 Tbsp liquid beef stock
250 g portobello mushrooms

Pastry
450 g flour
1 Tbsp salt
200 ml water
180 g butter

Potato Topping
6-8 baby potatoes, thinly sliced (if you are doing one big pie then use as many as necessary – a mandolin slicer works brilliantly here for even slices)

Beef Short Rib Filling

Preheat the oven to 160 ºC.

In a large frying pan, over a medium high heat, add a splash of oil and fry the onions until they just begin to colour but are still firm. Depending on the size your frying pan you may have to do this in batches. Once the  onions are done, transfer into a large dutch oven or casserole pot. Throw in the garlic and herbs and stir to combine.

Season the ribs well with salt and pepper. In a large frying pan, over a high heat, add a splash of oil and brown the ribs. This step is crucial for flavour, so take your time and get a good seared crust on all sides of the beef. Again, depending on the size of your frying pan, you may have to do this is stages. Be careful not to crowd the pan.

Once all the meat is browned, arrange it on top of the onions. Add the stock and beer. The liquid should be almost covering the meat. Add a little water if necessary. Place the pot into the oven and braise for four hours. At the four hour mark remove the pot and test the meat. It should be falling off the bone. Increase the oven temperature to 180 ºC.

Carefully remove all of the meat and place onto a tray. Using a pair of tongs strip the meat off the bones and pull it apart. Once you have a pile of pulled short rib, add it back to the pot. Stir to combine.

In a large frying pan fry the mushrooms in a little butter and then toss them into the meat mix. The filling is now ready and can be set aside until ready to use.

Pastry

Start by mixing the flour and salt in a large bowl. Bring the water and butter to a boil in a small saucepan. Make a well in centre of the flour and toss the melted, hot butter and water mixture into the middle. Mix with a spoon until it starts to come together. When it comes together as a nice ball of dough it’s done. Let the pastry cool and rest for a few minutes and then you’re ready to roll.

To assemble

Dust the rolling surface with flour and then roll the dough out to about the thickness of a R5 coin. From here you’re going to have to take some creative licence. If you’re making individual pies in pie moulds then cut enough pastry to fit your mould and be sure to leave a little lip at the top. Alternatively, if you are making one big pie then cut the pastry to the shape of your pie dish and leave a little lip at the top.

When the pie mix has cooled slightly, spoon into the pie casing. Avoid taking too much liquid from the pot, i.e. the meat mixture should not be too wet. Fill the pie/s until just under the pastry lip. Top the pie by layering the sliced potatoes in a circular pattern like the scales of a fish. Try to be as neat as possible. Brush the potato and the edges of the pastry with melted butter then pop it into the oven. Bake for 40-50 minutes until the top potato and pastry lip are golden brown.

Serve with your favourite condiment like a good chutney, Worcestershire sauce or onion marmalade.

miele.co.za | Facebook

Miele leaderboard-banner

Rogan Josh Lamb Shanks

Miele leaderboard-banner

Rogan Josh Lamb Shanks
Take the most tender lamb curry you’ve ever had then multiple it by ten and you’re somewhere close to these shanks. They’re juicy, spicy and they’re wrapped in enough layers of fragrant yoghurt to make your head bob from side to side in appreciation.

Serves: 4-6
Difficulty: moderate
Prep time: 45 mins
Cooking time: 3 ½ hours

Rogan Josh Spice Paste
1 Tbsp (15 ml) Garam Masala
1 Tbsp (15 ml) paprika
2 tsp (10 ml) cumin powder
2 tsp (10 ml) coriander powder
2 tsp (10 ml) chilli powder
1 tsp (5 ml) turmeric powder
1 tsp (5 ml) salt
1 tsp (5 ml) black pepper
100 g tomato paste
2 Tbsp (15 ml) sunflower oil

Shanks
4 lamb shanks
1 large onion, finely chopped
1 red pepper, finely chopped
2 garlic cloves, finely chopped
1 thumb ginger, finely chopped
250 g double cream yoghurt
100 ml lamb stock
100 ml cream

handful of fresh coriander, chopped
fresh rotis to serve

Rogan Josh Paste
Toast the spices in a dry pan until fragrant. Remove from the pan and place into a glass or ceramic bowl. Mix in the tomato paste and oil.

Shanks
Set the oven to 160 ºC.

Season the shanks with salt and pepper, and brown in a frying pan over high heat. Do two at a time so as not to crowd the pan.

Remove the shanks from the pan, and in the same pan, add a little oil and fry the onions and red pepper until golden. Add the garlic and ginger and fry for another minute. Add the curry paste and fry for another minute. Turn the heat to low and slowly add the yoghurt. Once the yoghurt is combined, add the stock and remove from the heat.

Place the shanks in an ovenproof dish. Pour the curry yoghurt marinade over the shanks. Roll the shanks around to make sure they are well coated. Close the dish with the lid, or alternatively, seal the dish with foil. Place in the oven for two hours.

After two hours, remove the dish from the oven, open the lid and turn the shanks over. Close the dish again, and place back in the oven for another hour.

Remove the dish from the oven, and remove the shanks from the dish. Pour off the oil from the sauce. Pour the sauce into a saucepan and add the cream. Bring to the boil and allow to reduce for 15 minutes.

Place the shanks into a serving dish and spoon the sauce over the shanks, reserving some of the sauce for serving. Season with cracked salt and pepper, and top with fresh coriander. Serve with fresh rotis to mop up that delicious sauce.

miele.co.za | Facebook

Miele leaderboard-banner

Slow Cooked Meat Ragù

Miele leaderboard-banner

Slow Cooked Meat Ragù

You might be tempted to say this is just spag-bol but you’d be facing the wrath of every Italian grandmother ever born. Proper ragu truly is a spiritual experience. The long simmering and combination of meats and fats produces a sauce that can only be described as meat butter for pasta.

Serves: 6-8
Difficulty: moderate
Prep time:  1 hour
Cooking time: 4 hours

Ragù
a splash of oil for frying
500 g good quality beef mince (chuck steak, ask your butcher to grind it)
500 g good quality lamb mince
6 pork sausages, meat removed from casing and chopped
3 beef bone marrows
250 g streaky bacon, diced
1 large onion, diced
3 garlic cloves, finely chopped
3 medium carrots, grated
4 celery sticks, finely diced
2 C (500 ml) red wine
small handful of chopped sage
small handful of chopped rosemary
small handful of chopped flat leaf parsley
2 bay leaves
8 anchovies, chopped
2 x 410 g tins whole peeled tomato, crushed
1 C (250 ml) milk
2 C (500 ml) good quality beef stock

1 C (250 ml) cream
60 g grated hard cheese or parmesan
small handful of chopped parsley

To serve
fresh tagliatelle pasta (make your own here, cut between 8-10 cm width)
grated Parmesan Cheese

Ragù
Set the oven to 230 ºC.

In a large dutch oven, over a medium high heat, fry the onions until they just start to colour. Add the diced bacon and fry until cooked, then add the garlic and fry until aromatic. Add the carrots and celery and fry for a couple of minutes until the vegetables begins to soften. Cook out any liquid that is released.

Line a roasting tray with tin foil then place your marrow bones on the tray standing up. Roast in the oven for 10-15 minutes until the marrow is soft and loose in the bones. Let the bones cool slightly then use a knife to scrape the marrow out of the bones. Set it aside for use later. Turn the oven down to 150 ºC.

In a large frying pan heat a splash of extra virgin olive oil and brown the meat. It’s best to do this in batches at so that you don’t crowd the pan, otherwise the meat ends up stewing instead of frying. Cook off all the water that releases from the meat and continue to brown. Repeat until the beef, lamb and pork are all done. Add all of the meat and the marrow from the bones into the pot of vegetables. Add the wine and cook over high heat until it’s mostly evaporated.

Add the sage, rosemary, parsley, bay leaves, anchovies, tomatoes, milk and stock then stir well to combine. Pop the pot into the oven with the lid off. The ragù should simmer gently in the oven for four hours. Give it a stir occasionally during the cooking process.

Remove the ragù at the four hour mark. You’ll notice all the oil has separated and is sitting in a layer above the meat. There should be a good layer of it. If there is too much you can skim a little off but be sure to leave some. The cream will emulsify with the oil to create a rich sauce.

Place the pot back over medium high heat then stir in the Parmesan, parsley, cream and mix well to emulsify. Once the ragù is thick and glossy you can turn off the heat and prep the pasta.

Cook your pasta to al dente and just before you drain it, scoop a cup of pasta water out with a cup measure and set aside. Drain the pasta and toss in a little olive oil.

To serve, dish a portion of ragu into a frying pan over a medium heat. Add a portion of pasta then a splash of the pasta water and stir to combine. The pasta water will loosen the sauce  and coat the pasta in the meaty sauce. Serve immediately with plenty of grated Parmesan.

miele.co.za | Facebook

Miele leaderboard-banner

Country Pumpkin Pie


Country Pumpkin Pie Miele leaderboard-banner

Country Pumpkin Pie

It’s sweet, it’s savoury and it’s wrapped in a coconut crust. Yes pumpkin pie may be a big deal in America but it’s seldom seem on our shores. We aim to change that one ridiculously delicious slice at a time, and what better time to start than right now?

Serves: 6-8
Difficulty: moderate
Prep time: 1 hour + 2 hours drain pumpkin
Cooking time: 45 minutes

Filling
1kg raw pumpkin, cubed
2 tsp (10 ml) cinnamon
125 g butter
1 C (250 ml) brown sugar
1 tsp (5 ml) vanilla essence
3 eggs
1 C (250 ml) flour
1 tsp (5 ml) baking powder
1 tsp (5 ml) salt

Base
300 g Tennis biscuits
90 g butter, melted
1 tsp (5 ml) cinnamon
1/2 tsp (2.5 ml) allspice

Toppings
250 g streaky bacon
small bag of caramelised nuts or a small bar of nut brittle, crushed
good quality vanilla ice cream

Filling First Step
Place the pumpkin in a saucepan of salted water. Boil under soft and then drain.

Mash or blitz the pumpkin – you want it to be as smooth as possible. Scoop the pumpkin into a sieve and leave to drain until almost all the moisture has run out – at least 2 hours, longer if possible (even overnight will work). Stir the pumpkin occasionally. You can place a small plate on top of the pumpkin to add some weight. Once well drained, stir in the cinnamon.

Base
Blitz the biscuits in the food processor to a fine crumb. Stir in the melted butter and spices and mix to combine. Pour two thirds of the crumbled mixture into your pie tin (20 cm springform pan) and gently press down to create an even base. Use the remaining third to build up the sides of the pie crust until you reach the lip of the pie dish. Place your pie dish into the fridge for at least 30 minutes to firm up. We opted to create a quite a thick crust as we love the crunch factor and the rustic look – create yours to your preference.

Filling Second Step
Set the oven to 180 ºC.

In a stand mixer, cream the butter and sugar until light and fluffy.

Add the eggs one at a time and and mix to combine. Scrape down the sides of the mixer, add the second egg and vanilla and continue to mix.

Sift the flour, baking powder and salt together. Slowly add the dry ingredients to the batter while the machine is running. Once combined you should have a smooth batter. Carefully pour the batter into your chilled pie dish and put into the oven.

Bake the pie for 45 minutes. After 45 minutes your pie should be done. The centre will remain a little jiggly as you remove it but this will set as it cools. Let the pie cool completely in the tin before releasing the spring.

Toppings
In a large frying pan, fry the bacon over a low heat until very crispy. Drain the bacon on kitchen towel. Break the bacon pieces into shards and set aside.

Crush the caramelised nuts/brittle to a fine crumble.

Serve a slice of pie with a generous dollop of vanilla ice cream, topped with shards of bacon and a sprinkling of nut crumble.

If you love slow winter food, have a  look at this recipe for slow-cooked meat ragù.

miele.co.za | Facebook

Country Pumpkin Pie Miele leaderboard-banner

Shibori Scatter Cushions

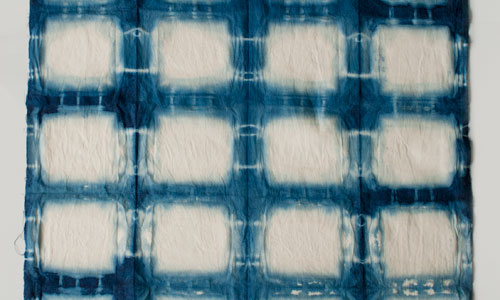
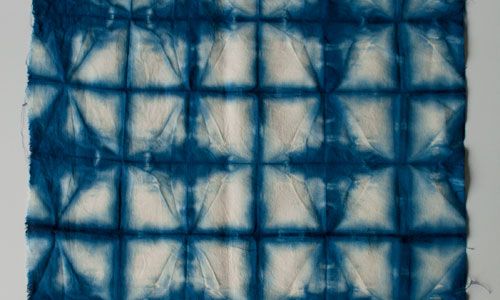
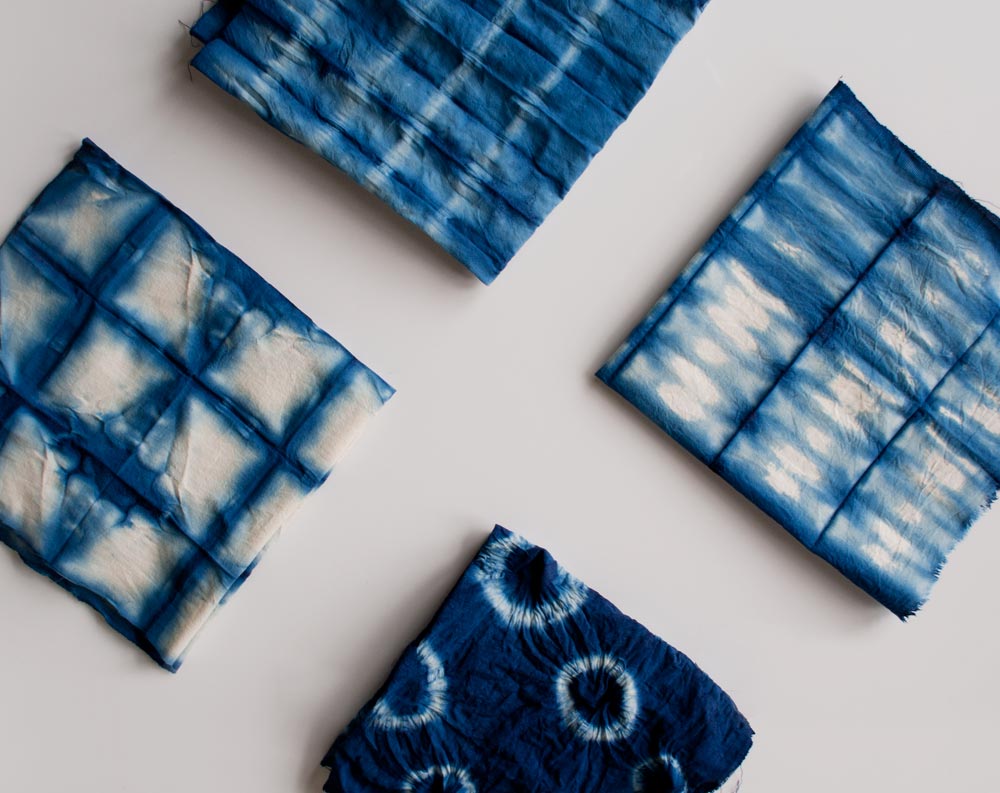
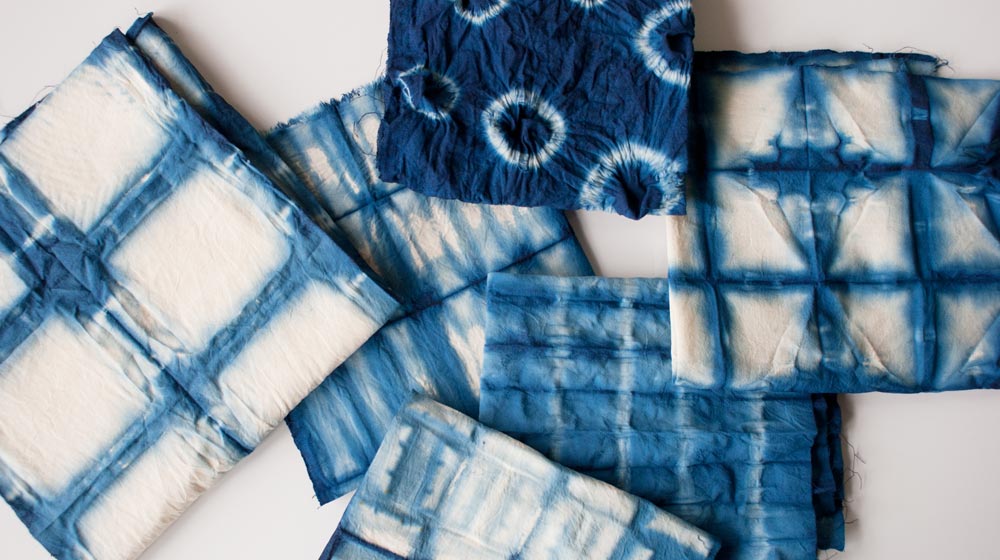
Shibori is the Japanese word for a variety of ways of embellishing textiles by shaping cloth and securing it before dyeing. The word comes from the verb root shiboru, “to wring, squeeze, press.” This type of dying gives a three-dimensional look and produces intricate patterns. The patterns are a result of the way that the material is folded and twisted and how it is bound and knotted.

What you will need

4 m of unbleached linen in white
fabric dye (we used cold Lady Dye)
roll of string
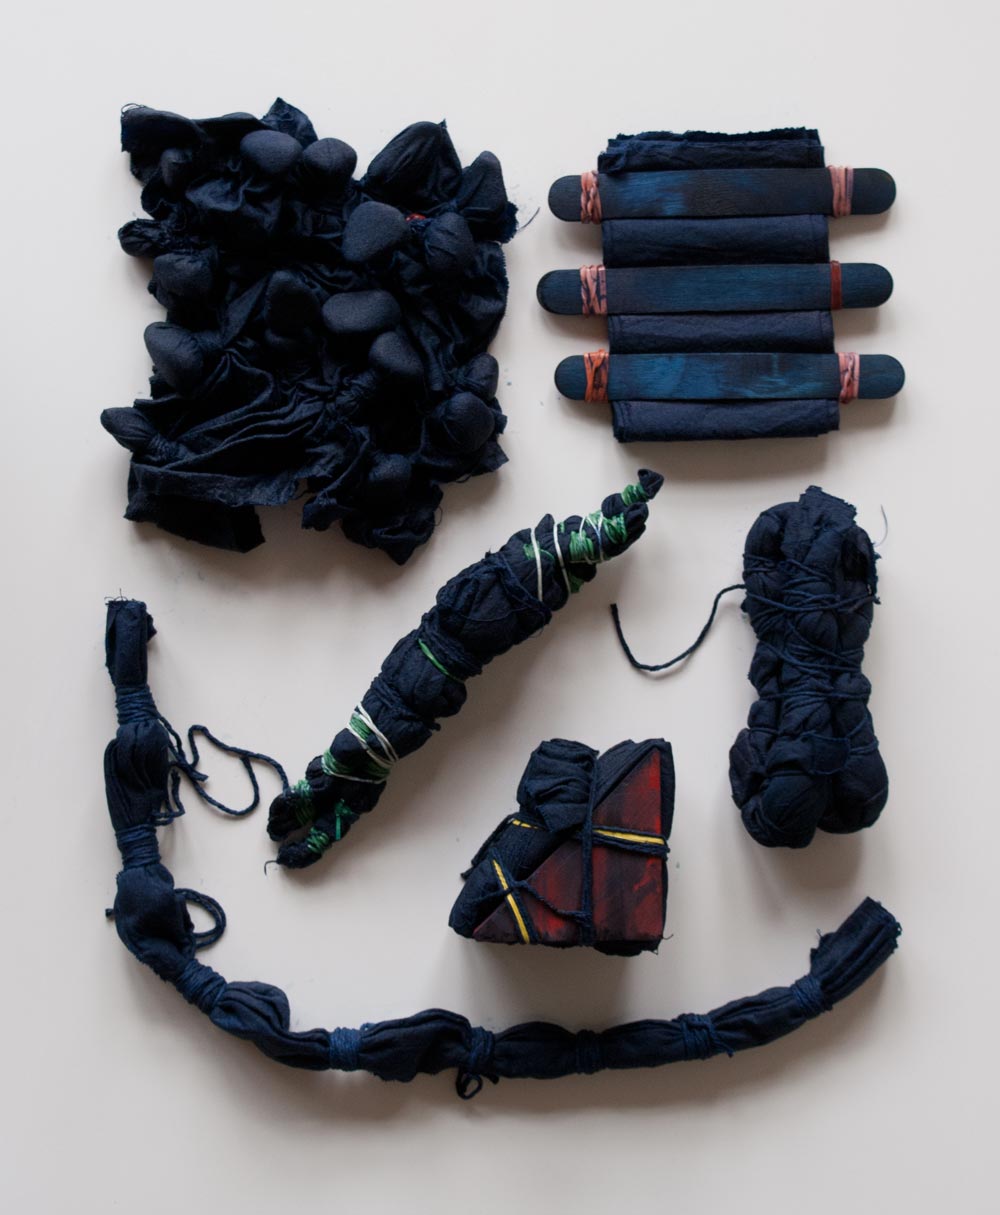
resists – i.e. wooden blocks/tiles/popsicle sticks/bull clips/plastic shapes/small pebbles to use to create shapes within the fabric
cushion inners
salt

rubber gloves
plastic bucket or steel bowl
scissors

Fabric Cutting

Cut the fabric into 1 x 50 cm square piece for the front and 2 x 50 cm x 35 cm pieces for the back piece.

Preparing to Dye

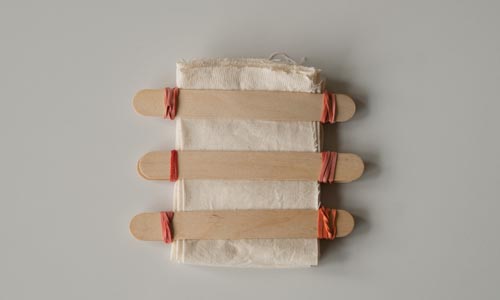
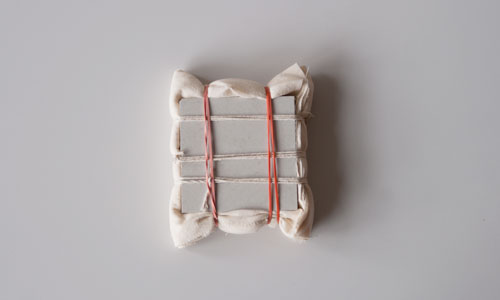
Fold the 50 cm blocks into small squares. When folding the material, use a concertina method to fold. This will allow for more even colouring. See diagram for different folding techniques.

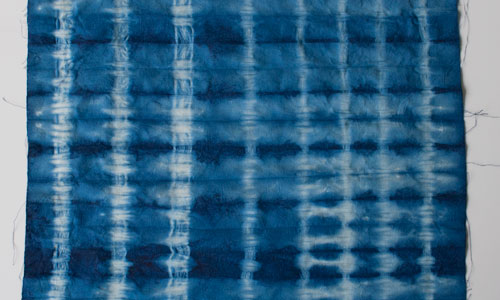
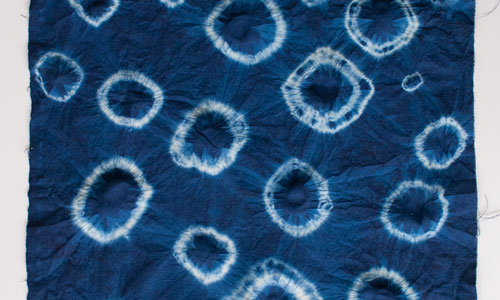
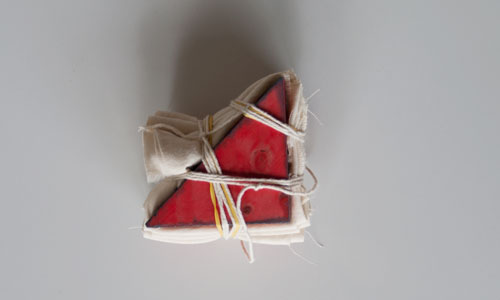
Twist the fabric or fold into squares or triangles and secure with string and elastic bands. Wherever the fabric is bound or covered it will be white. Click here to see what effect the different binding and wrapping will result in. If the desired result is to have the colour as evenly spread as possible, be sure to concertina fold each piece. The bigger your ‘resists’ (i.e. the blocks and ties etc that will resist the colour), the more white will be visible. Use shapes to create interesting patterns. Make sure the pieces are tightly bound.

Dyeing

Put on your rubber gloves.

Mix the dye powder with a bit of water to form a paste. Then mix the dye into 2 litres of warm water, following the dye mix packet instructions. Add 2-4 heaped tablespoons of salt and mix well.

Place each wrapped item into the dye for 15 minutes. The longer the piece is left in the dye, the darker it will be. The pieces can be removed and retured to the dye until the desired shade is achieved. Keep in mind, that until rinsed in water, the pieces will look very dark https://mgpharmacie.com. Remove from the dye. Add the fixative to the dye and mix well. Place each item back into the dye for a further 10 minutes.

Remove and hang to dry overnight – do not unwrap until dry. Mix a couple of tablespoons of salt into 4 litres of water. Once dry, unwrap the covers and rinse in the salt water. Rinse until the water runs clear. Tumble dry to help fix the dye. Once dry, start making the cushion covers.


Shibori-Cushions
Sewing the Covers

The hem will finish the opening. To form hem of back 1 fold 2.5 cm of the bottom over and iron flat. Fold it over 2.5 cm again, and iron it flat and then using a sewing machine flat stitch. Do the same with back 2, but instead of at the bottom, do this step at the top. Lay the front piece flat. Line up back 1 with the top of the front piece. The folded side of the hem faces up. Line back 2 up with the bottom of the front piece. The two back pieces will overlap. Pin and flat stitch 2.5 cm around the cushion cover. Set the machine to a narrow zig zag setting. Sew around the edges of the square to prevent the cushion from fraying.

Turn the cover inside out and cover cushion.
Shibori-Cushions

Shibori-Cushions

See our other weekend projects HERE.

The New EVS Vacuum-Sealing Drawers from Miele

Miele leaderboard-banner
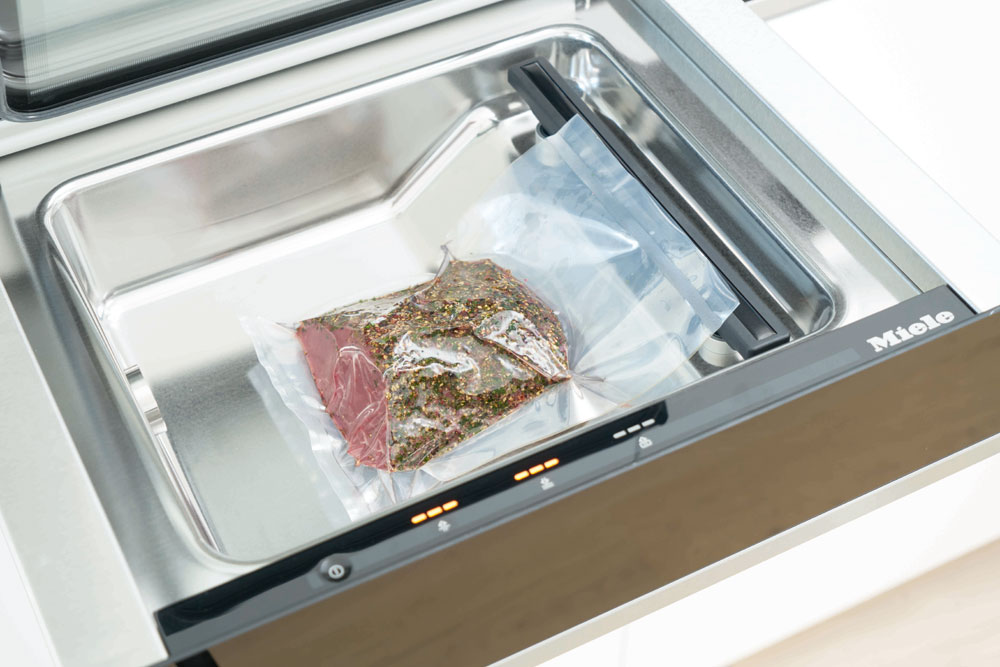
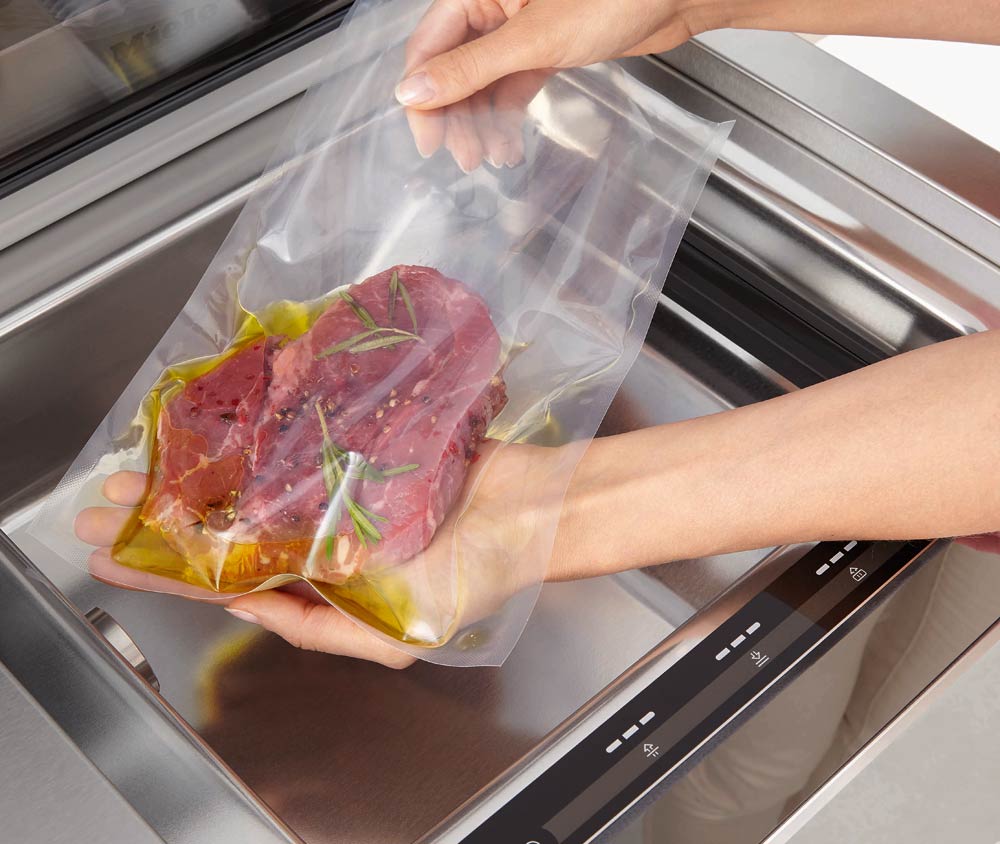
Vacuum sealing is a tried-and-tested method of extending the storage life of food and of conveniently portioning larger quantities. In top restaurants, food is often vacuum-sealed in preparation for sous-vide cooking. With a new built-in vacuum-sealing drawer from Miele, consumers now have access to the full range of applications in the convenience of their own homes.

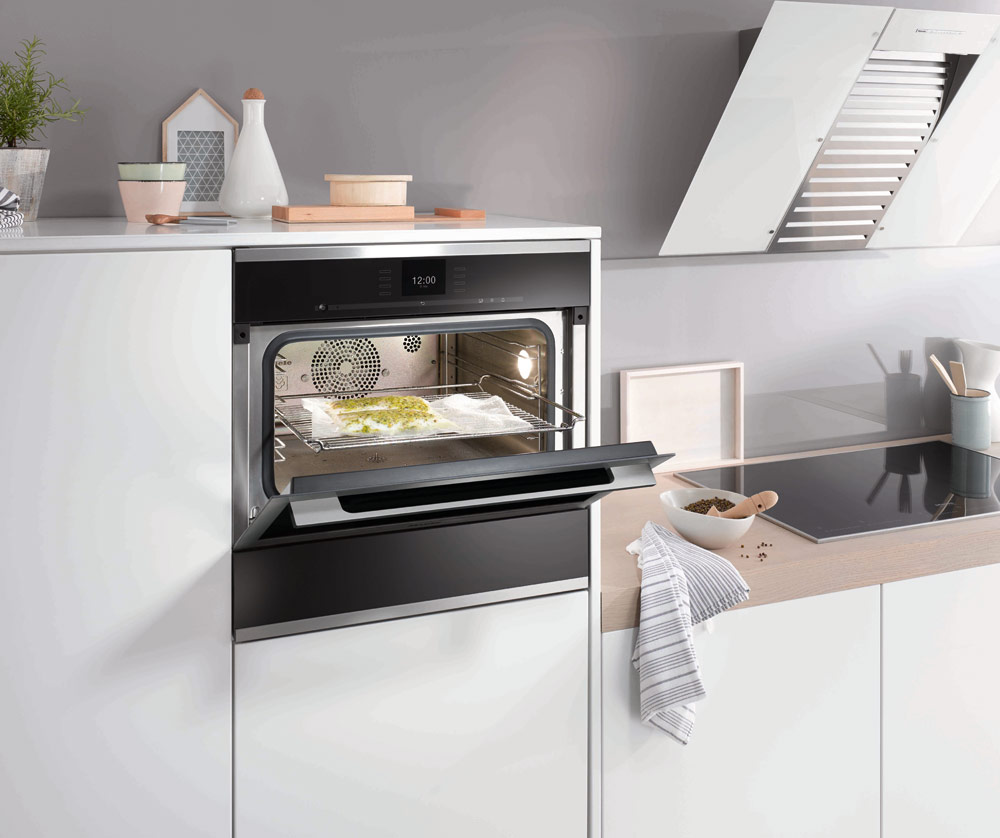
 Sous-vide is a French term meaning ‘under vacuum’ and refers to the method of preparation where food is vacuum-packed in plastic bags. It’s then cooked at low, steadily maintained temperatures over an extended period of time. Miele’s EVS 6214 and EVS 6114 built-in vacuum-sealing drawers have been specially designed to facilitate in-home sous-vide cooking.
Miele
The controls allow the user to set the vacuum-sealing stage and the sealing duration, the latter being dependent on the thickness of the bag material. For foodstuffs requiring handling with care, such as fish fillets for example, Miele recommends Setting 2; whereas Setting 3 is ideal for meat and vegetables. The higher setting draws almost a complete vacuum and meets professional demands.

Evacuating air, and hence oxygen, offers control over the two main factors responsible for food spoilage – namely unwanted oxidation and the growth of bacteria. It also prevents food from drying out.

Depending on the initial condition of the food, vacuum sealing can extend its storage life by a factor of between three and five, allowing food to be consumed later without any risk. This can be a huge benefit when preparing large quantities of food for consumption later.

Once vacuum-sealed, food will remain fresh for longer in a freezer or in the PerfectFresh compartment of a Miele refrigerator, and it is also protected against freezer burn. Thanks to the vacuum, the food also requires less storage space, maximising the space available in fridges and freezers.
Miele
Both the Miele EVS 6214 and the EVS 6114 vacuum drawers conform to the design of Miele’s Generation 6000 built-in appliances and it is, from the outside, hard to tell apart from a Miele warmer drawer. With a fascia height of only 14cm, this product ideally combines with various compact units to fill a classic 60cm recess. The vacuum chamber only becomes visible when the drawer is opened.
Miele
The Miele EVS 6214 and the EVS 6114 built-in vacuum-sealing drawers boast the following benefits and features:

  • A generous usable area: The Miele vacuum-sealing drawer is suitable for different sizes of bags and containers. The interior space is big enough for all sorts of food – from small portions up to a maximum size of 250mm x 350mm and a height of up to 80mm.
  • Push2open mechanism: Open with a gentle touch – only the lightest touch is sufficient to open the drawer.
  • Touch controls: Miele vacuuming drawers are operated via a state-of-the-art flush glass touch control panel – making them particularly convenient to use and easy to clean.
  • Fully telescopic runners: Thanks to telescopic runners, the drawers can be easily loaded, and the built-in vacuuming drawer can open up completely to make it easier to load.
  • Food storage: Vacuum-sealed foodstuffs stay fresh for longer. Once vacuum-sealed, fish and vegetables stay fresh for longer, without compromising on taste or quality. Vacuum sealing protects food against freezer burn, or contamination via smell or flavor, and it ensures that bread and rolls remain fresh for much longer at room temperature.
  • Vacuum bags: The Miele EVS 6214 and the EVS 6114 built-in vacuum-sealing drawers are supplied with 100 plastic bags in two sizes – 50 large and 50 small. The bags are food-safe, heat-resistant, boil-proof and tear-resistant and contain no plasticisers. Food is safely stored, and any transfer of flavours is prevented. Additional vacuum bags are available to purchase from the Miele shop.
  • Dividing food into portions: If you divide your herbs, cheese or sliced meat into smaller portions, you will always have fresh products on hand. Soft cheese remains fresh for considerably longer when it has been vacuum-sealed. A portion of lasagne can be easily warmed up in the steam combination oven in a vacuum bag. Foodstuffs such as muesli can be portioned out dry using the vacuuming drawer in order to save space – an ideal option when storage is at a premium or when travelling.
  • Marinating: For a really intense flavour, marinate your food in your usual manner and then vacuum-seal it with the Miele vacuuming drawer. By vacuum sealing, the taste of the marinade is greatly intensified, since flavours do not oxidise. Instead, the herbs and spices remain in a very concentrated form and are permanently in direct contact with the food.
  • Vacuuming in containers: Ideal for delicate foodstuffs, vacuuming food in containers is perfect for vegetables and herbs that are sensitive to bruising, as well as for daily foodstuffs, such as sliced meat. The containers are an optional online accessory – they are simply connected to a special adapter in the vacuuming drawer, which then extracts all the air. The containers are reusable, which makes the process much kinder to the environment.
  • Re-closing packaging: After an evening in front of the TV with crisps and popcorn, there are often some opened bags that have not been finished. What should you do with them? The vacuuming drawer offers the perfect solution – it seals the original packaging gently and securely on setting 1. This means that foodstuffs are protected against contamination via taste or smell – so they’re just as fresh the next time around.
  • Easy care interior: To ensure easy cleaning, the vacuuming chamber is equipped with seamless stainless steel sheets, making it particularly easy to clean after use.

Miele
Both the Miele EVS 6214 and the EVS 6114 built-in vacuum-sealing drawers retail for R34 999,00. Visit their website to find out more or to find a retailer closest to you. Alternatively, you can shop directly online.

miele.co.za | Facebook 

miele-logo-banner

A Modern Renaissance of The Bronze Age

Miele leaderboard-banner
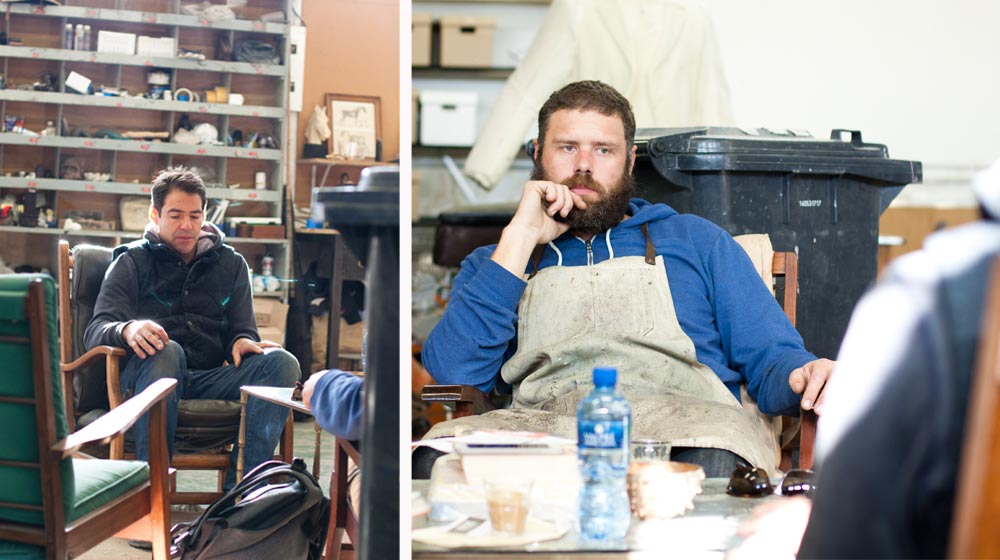
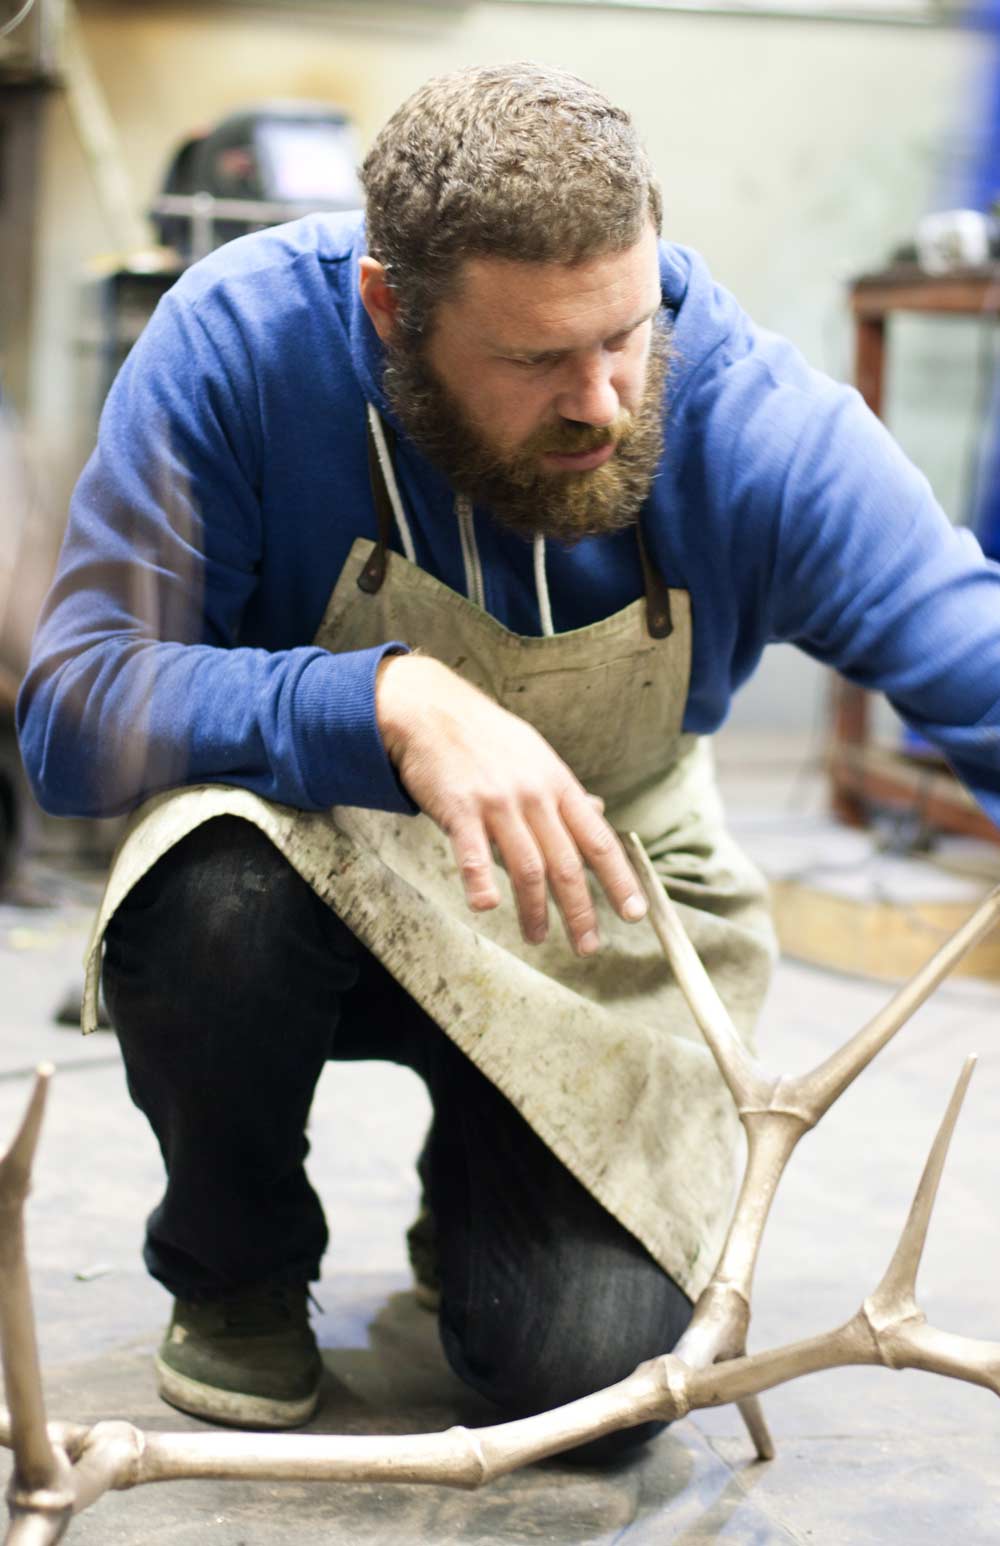
The modern world we live in has seen artisan skills, such as metalsmithing, take a back seat in favour of cheap, mass produced products. A sad fact, but a true one nonetheless. The term metalsmithing isn’t even heard that often anymore and might conjure up images of sooty-faced characters hammering away at swords and battle axes. While the need for fire-forged swords may be bygone, the skill of modern metal work is very much alive. Otto du Plessis and Charles Haupt are two Cape Town-based bronzesmiths who are ensuring that this age-old craft finds its place in the world of contemporary art.
Bronze-Age
Otto du Plessis has been fundamental in the instilling the art of bronzing into the hearts of Capetonians. For a guy who originally studied Marketing, the move to this creative was a career defining moment that has set him on an entirely different course. The art of bronzing called to him and he answered. In the mid-90s Otto set up his first foundry, Bronze Age, in the idyllic town of Simonstown – here he worked on his own designs, as well as doing castings and making bronze pieces for other artists, namely Donald Greig who had moved to Cape Town and needed a foundry for his jewellery and art. What was unique about the foundry was the opportunity for artists to take any of their pieces of work and turn them into bronze – immortalising their most treasured pieces.
Bronze-Age
Despite having a fully functioning foundry, there was room for one more creative mind and that was Charles Haupt. While studying industrial design at Cape Peninsula University of Technology, he went on a tour of the Simonstown foundry and met Otto. The two got along well and Otto asked Charles to help out with some design work when he was finished his studies. Charles agreed and a bond was forged. Despite the fact that Charles left to work in London for a couple of years, they remained in touch and upon his return to Cape Town the two reconnected. The pair put their creative skills and business minds together to push the business to new heights which included a move from Simonstown to bigger premises in Woodstock.
Bronze-AgeBronze-Age

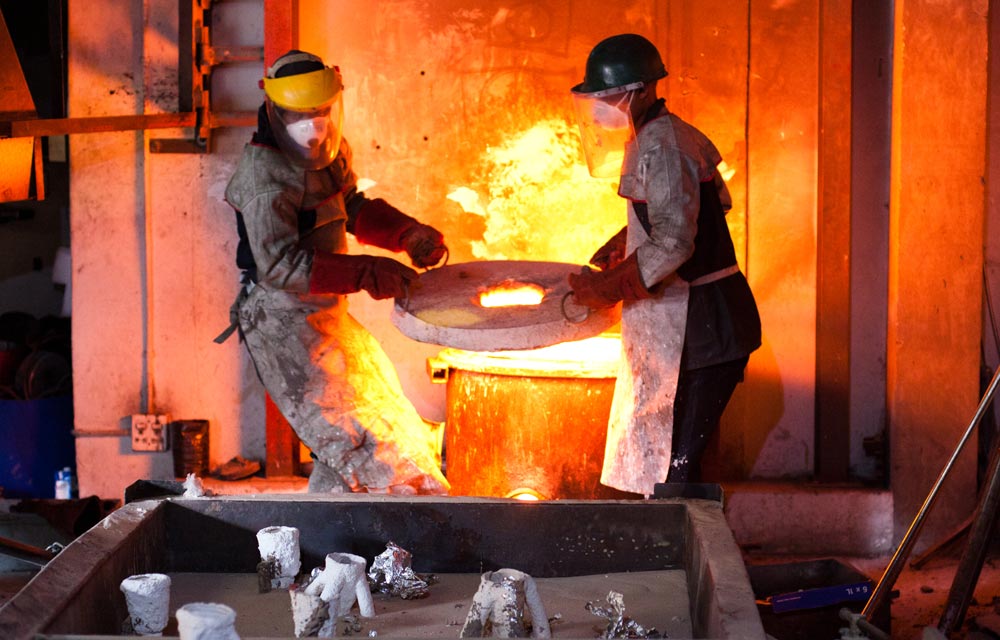
The procedure of bronzing is an intricate and interesting one. At Bronze Age they make use of a process called lost wax casting, which allows for a more detailed and precise mould. For a romantic, sentimental art form, this technique makes it seem even more old-world.

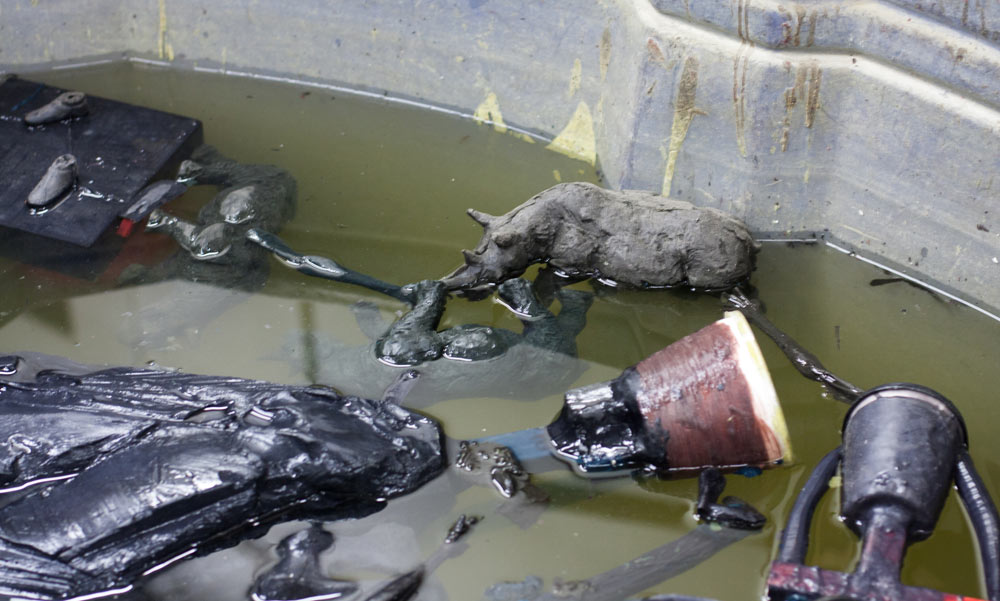
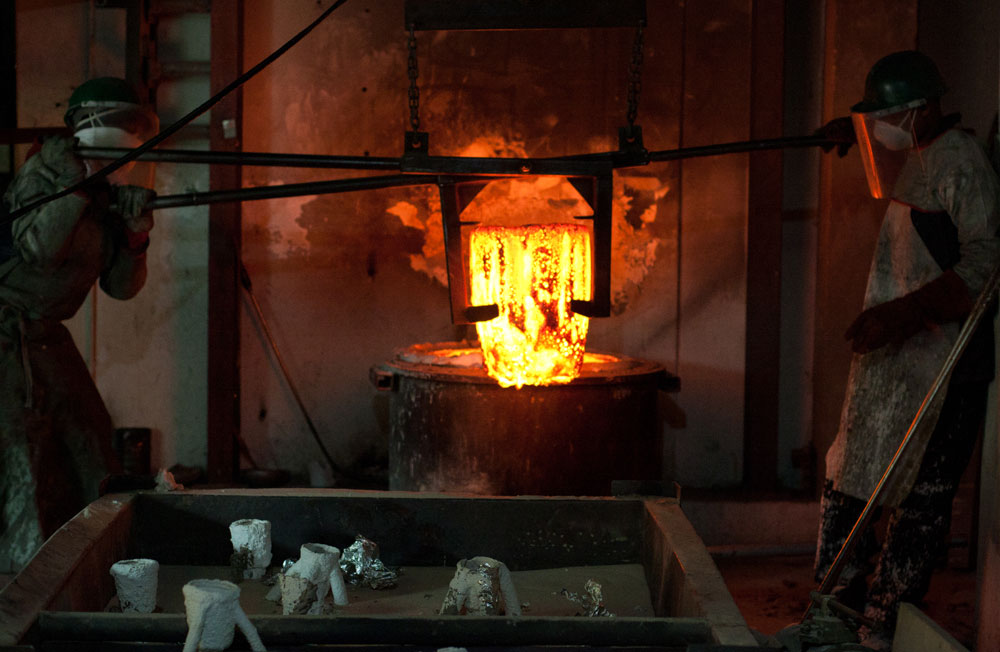
How it works is that an artist brings in any piece of their choosing they wish to have bronzed. This is copied perfectly, using silicone and fibreglass to form a mould. Hot wax is then poured into the model and swished around to coat the inner surface and forms a shell. This wax shell is ‘gated’, which controls the passage of the bronze into each particular nook and cranny. This piece is then dipped as a whole into a ceramic case and then dipped a second, third and even fourth time into a fine, dry medium and coarse sand each time, to further stabilise the mould. From there, the wax is lost (hence the name) by firing the ceramic frame, allowing the wax to melt  out. Lastly, any remaining gating is  removed from the shell. At this stage, there is a ceramic, shell-coated cast that is ready for hot metals. All that is left is for the bronze, to be melted and poured into the cast, but this is by no means a small feat.

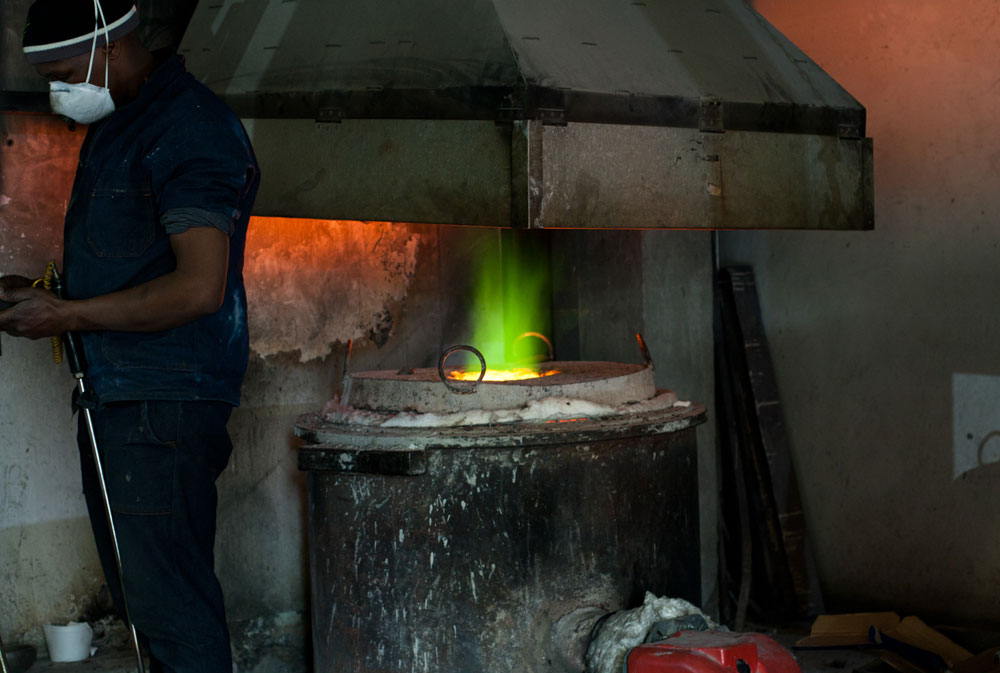
The metal is heated in a blazing furnace to over 1200 ºC and from its solid form it is transformed into a fiery molten liquid that glows like melted sunshine.

Bronze-Age
Bronze-Age
Bronze-Age
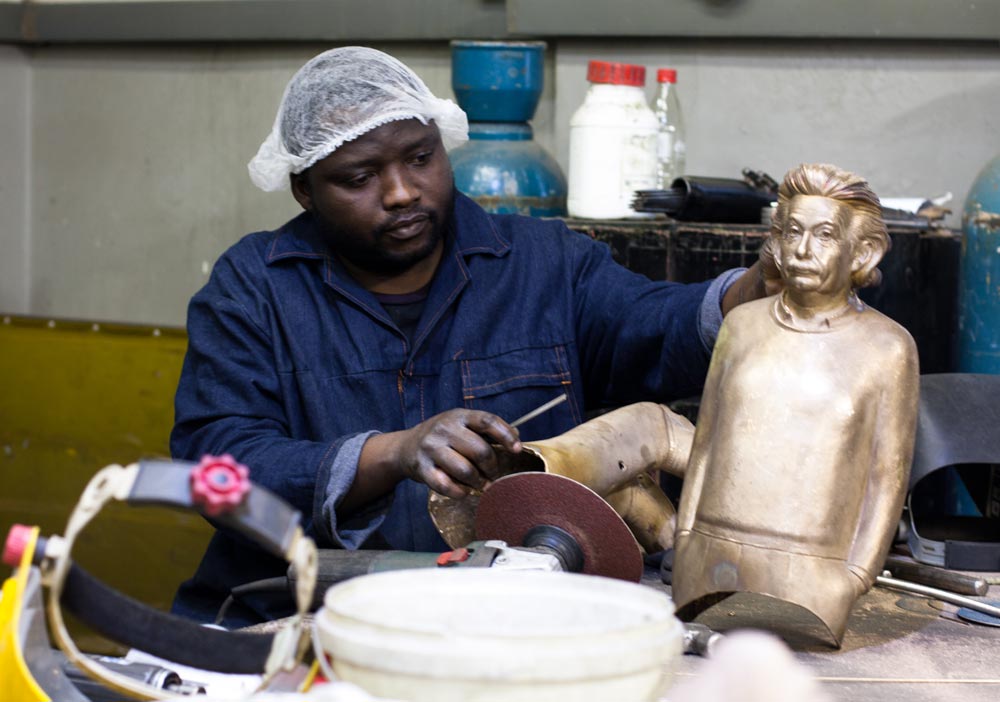
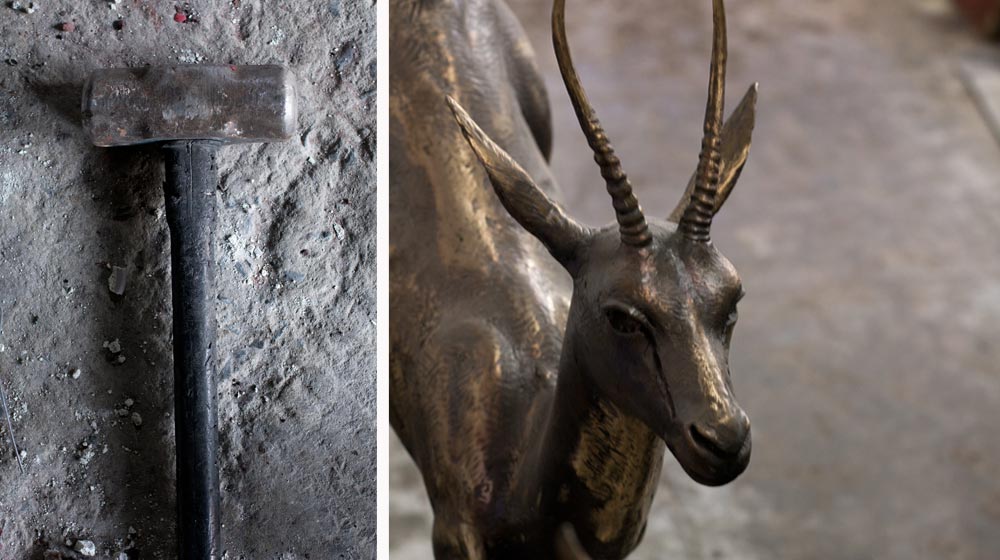
Once the bronze sculpture is released from its ceramic shell, any residues can be chipped or sandblasted away. From there, it turns into a recognisable piece of art when the colours or textures are added. The colours we often assimilate with bronze, those tell-tale greens, browns and rust, are all manipulated by the use of chemicals that cause oxidisation. Pieces can be polished for a high-shine effect, or left matte and burnished.Bronze-Age
Bronze-Age
What’s next for Bronze Age? Well, they’re currently in the process of relocating the foundry to an exciting space at the Waterfront. The new foundry will be bigger and even busier, allowing them more space to work on their own designs, while still casting for local and international artists.

The creative world of Cape Town is close knit and supportive; and Bronze Age is one of the dynamic businesses run by hard-working, innovative people, that make the industry what it is.

If you think that bronzing is somewhat outdated, think again. Bronze Age has taken metalwork out of the, well, dark ages, and made it exciting and cutting-edge once more.
Bronze-Age
bronzeage.co.za | Facebook 
miele-logo-banner

Road Tripping to the Darling Brew Beer Festival

When we hit the road to Darling Brew for their first beer fest, we didn’t know what to expect. First time festivals can often be hit or miss and when you throw in a long drive, well… the skeptic in me was worried. It’s not that you need a huge crowd to make a beer fest good but it does help. As we rounded the corner and turned into Darling Brew, I am happy to report that we were blown away. The parking lot was rammed and there were people everywhere.
Darling-brew-fest-5
After a short queue we got into the fest holding a slick Darling branded glass. To my surprise the glass was included in the seriously reasonable ticket price of R75. I stand corrected but that might be one of the cheapest beer fest tickets I’ve ever paid for. As we shuffled through the crowd we bumped into the owner of Darling Brew, Kevin. I told him we were amazed at the crowd, he laughed and replied that so was he. It turns out that they were worried about attendance with it being their first fest and all.

A festival of any kind is always a gamble but this one paid off big time. There were all sorts of people at the fest and a large portion of them were families. Darling have gone out of their way to make the brewery as family friendly as possible, and it’s clearly working out. For the fest they had a marquet tent with tables, chairs and hay bales for extra seating, as well as a collection of food trucks, and merchandise on sale.
darling-brew-1000x4
darling-brew-fest
From outside we moved inside to where the breweries were set up. There were six on show namely: Garagista Beer Co., Riot Beer, Mountain Brewing, Flagship Brewery, Berg River Brewery, and Darling Brew. There was a decent selection of beers on offer and we tried to get to as many as possible. Even though the inside of the brewery was chaos, the brewers of each stand still found time to talk to us about their beers. We had a great chat to PG from Mountain Brewing who enthusiastically took us through all his beers.
darling-fest
DARLING-BREW-FEsT
After many a taster and a few missed ones – Flagship had sold out before we got to them – we hit Darling’s stand for a few Blood Serpents. I really like this new dry hopped lager and if you haven’t had one yet then you need to up your game. From Darling’s stand we had a great view to drink and people watch. The inside of the brewery had been converted into an Oktoberfest-style set up with long tables and chairs complete with a live music stage. People were singing, dancing, drinking and having a merry old time.
DARLING-BREW
As the day wound down we moved onto Darling’s Warlord Imperial IPA. It’s a big and beefy brew with a hefty 9% kick. It seemed a fitting end to a great day at one of South Africa’s top craft breweries. We can’t wait for next year’s fest and if we know anything about Darling, it’s definitely going to be bigger and even better.

darlingbrew.co.za | Facebook | Twitter | Instagram

Villiera’s Sustainability Grows More Than Just Vines

Reliance Compost
Villiera is a well known name in South African wine circles, but what might be lesser known, is the heart and story behind this family-run winery. In a business as big as wine, taking the greener route is not always an option. The biggest argument against going green is that it can be costly and that it doesn’t make financial sense. Well, Villiera, under the guidance of owner Simon Grier, is breaking those misconceptions. Sustainable agriculture actually does make financial sense. But more than that, Villiera is setting a new tone for wine estates across the country.

Simon believes that it’s more important to show what you do, than to say what you don’t do, and Villiera is a great example of this belief  in practice.

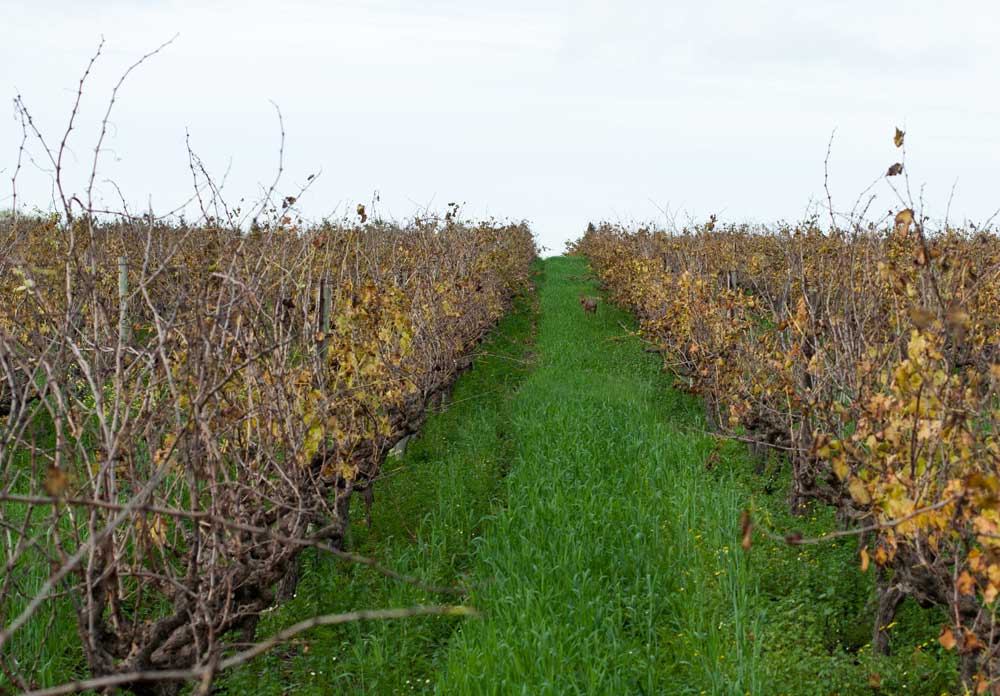
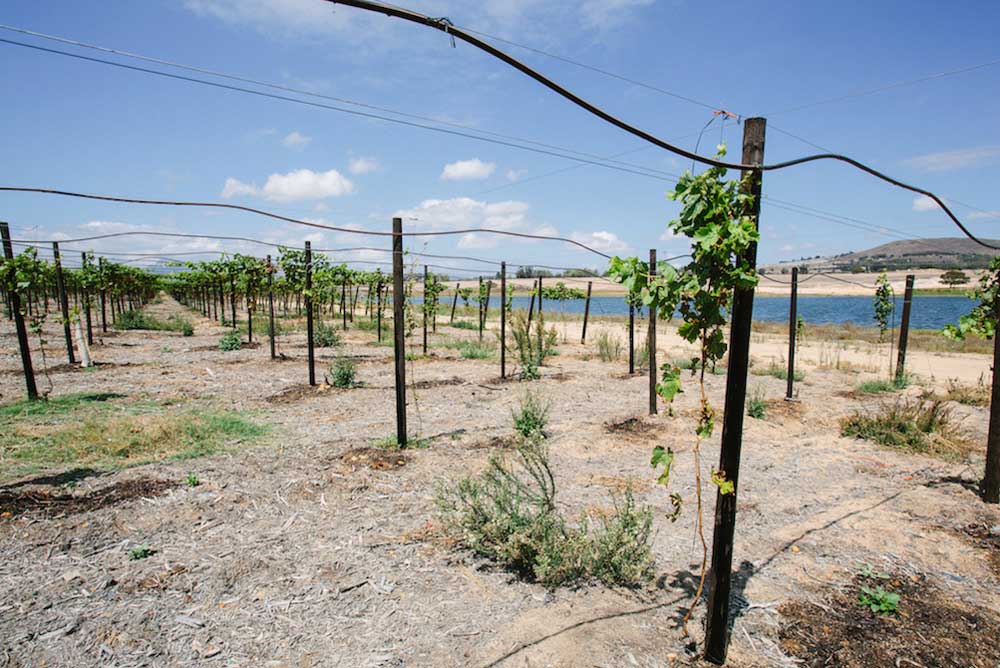
The farm is no stranger to the concept of greater environmental awareness and have not used insecticides on their vineyards for 14 years. It’s not always an easy decision to move away from what you know and did previously, it can be a scary and costly venture, but it does pay off in the long term, which is what they have proven. With all the information and technology available today business owners, especially farmers, have to question what has been done in the past, and ask if it’s still relevant today.

villiera
The Griers did this and found that commercial, aggressive farming methods were a dying breed. That was coupled with the realisation that Simon didn’t feel ok asking someone to spray chemicals, or to be so exposed to them. It just didn’t sit right. And then he dared ask the question that chemical suppliers dread: “What happens if we just stop spraying?”. So they tried it, and what Simon saw happen was simply that their problems disappeared.

For the most part, once insecticides were given the boot, the pests in the vineyards certainly exploded but before long, the natural predators moved in and took over. Natural balance was being restored. But that wasn’t enough for Simon and he began to look at more environmentally-friendly replacements on the farm.

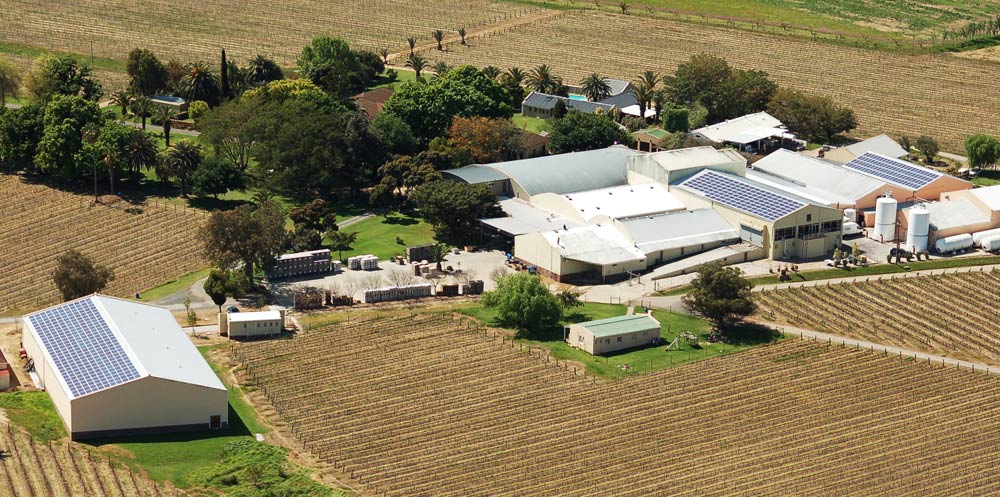
With electricity behaving badly these days, businesses can never feel 100% secure. Simon fortunately took to dealing with Eskom’s advisers directly and found them to be quite informative. He had a generator moved in right before load-shedding kicked off, but found himself thinking of other ways to ensure that the wine estate always had enough power. He figured that solar panels would ensure energy security but would also lessen the load on the environment. Villiera-Solar-Panels-from-air-001
Simon admits that it wasn’t a cheap installation, but by covering three of the wine cellars and the tasting room roofs  they managed to garner enough energy to make it worth their while. Through using all of this surface area they managed to save on electricity and actually pay off the solar panels sooner than they initially planned.

For Simon and Villiera, the financial difference the panels made was the cherry on top of being able to care for our overworked earth.

It didn’t stop there for Villiera. Wine making is a thirsty business that requires huge volumes of water every day. Water is scarce in South Africa and adds huge costs to an estate’s daily bill. Villiera is flanked by large pieces of land with roughly 12 dams dotted around them; using this resource made total sense. Harvesting natural rainwater is done via a meticulous method of by manoeuvring contours to lead the water to a reservoir. It can take the better part of a year to obtain the necessary amounts of water. But Simon enlisted expert help to look at the pipes they were using, and through a careful reworking, the pipes are able to bring in 1,2 million litres of rainwater. It’s free, completely pure and has no negative effect on the planet.
Villliera Dam
villiera
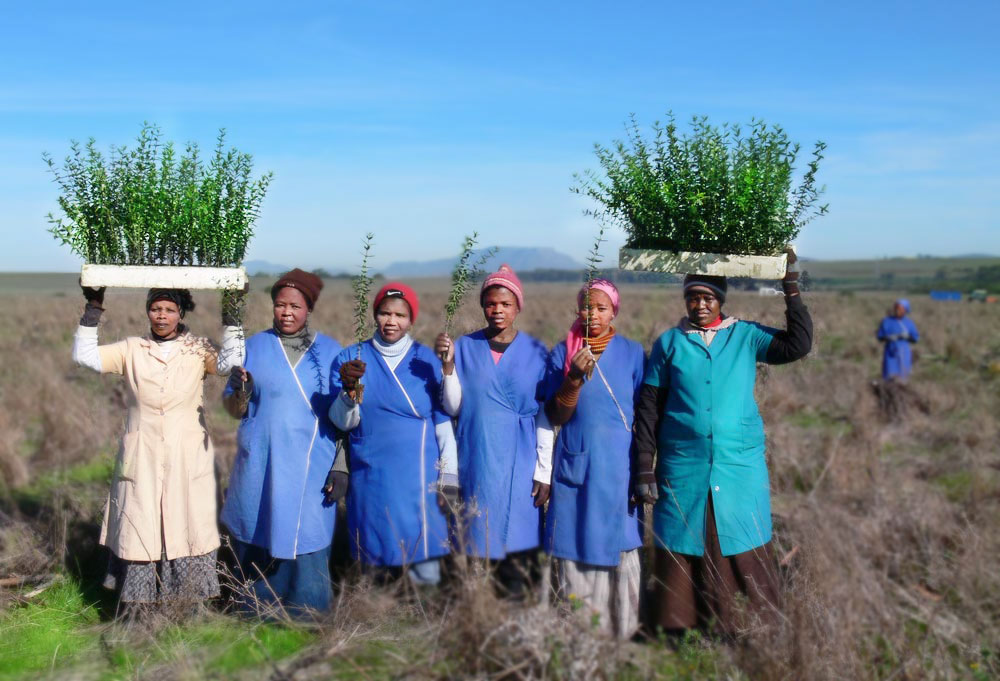
There’s also a huge carbon emission issue that stems from the wine industry. To counteract this, Simon discovered that planting five indigenous trees would negate the carbon released from 1 tonne of grapes. He then planted 20 00 trees in Villiera’s neighbouring wildlife sanctuary within a year.

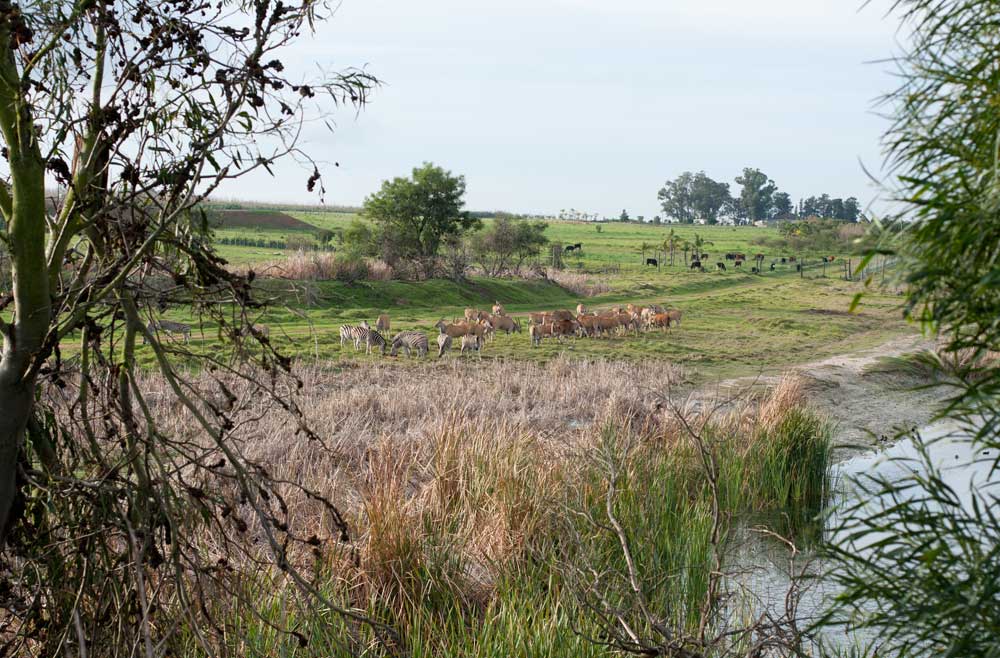
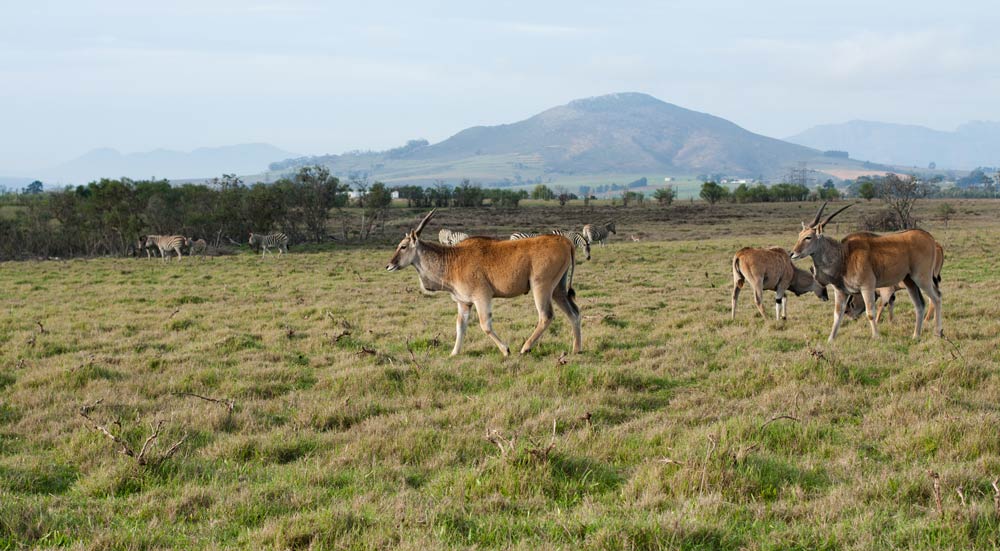
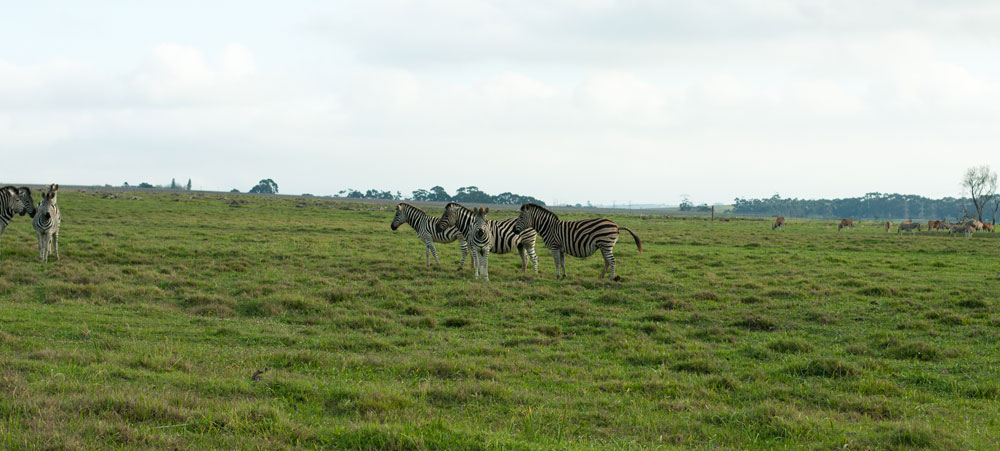
The sanctuary is home to herds of zebra, gemsbok, giraffe, springbok and others and they now currently have 100 000 indigenous trees on the property, helping to offset their carbon footprint.

Simon describes the planting process as being surprisingly easy and rewarding. He even managed to plant all of those trees with the help of the staff on the farm and reckons it’s quicker to plant an acacia than it is to plant a vine!

villiera-tree-planting_ villiera
There’s a real beautification that took place once all this environmental awareness began to gain momentum. And that really is one of the best things about being ‘green’. It’s clean, fresh and life-giving.

The final step in ensuring true ecological impact is recycling. Any big business is prone to large amounts of waste, most of which is recyclable, but often they don’t take the time to dispose of this waste responsibly. Villiera does.

When they do any sort of building work, they take the time to make sure that old bricks are carefully broken out of the cement to be reused, instead of demolishing everything and sending it off to a landfill. They reuse the wood, timber, and even paper cuttings on other construction projects. Anything leftover from the estate’s kitchen goes to the animal sanctuary. Engine oil is reserved and refined, old tires are filled with plastic bottles and reeds and sent out to float on the dams offering havens for waterbirds. There really is no end to the wonderful ways that Villiera is helping the environment.
villiera
villiera
And though the environment is of the utmost importance to Villiera, they also take into account the people who have to live and work on this earth. While doing their bit for the eco-system, they also set up a crèche, school and a free clinic for their staff, their families and the surrounding community. One can truly admire Villiera for a number of reasons. Their wine, for example, is world class. Their estate is beautifully nestled between Cape Town and Stellenbosch. But what really makes them truly stand out from every other wine farm is how they view the environment. To them, it’s not disposable and open to abuse. It must be cared for and respected. And that is exactly what Villiera is doing.
Indigenous-plants-villiera
villiera.com | Facebook | Twitter | Instagram

Delicious produce is grown in healthy, living soil. #Harvesttotable series brought to you by Reliance Compost.

Reliance Compost

Catch Him if You Can: Ryan Sandes Ultra Distance Runner

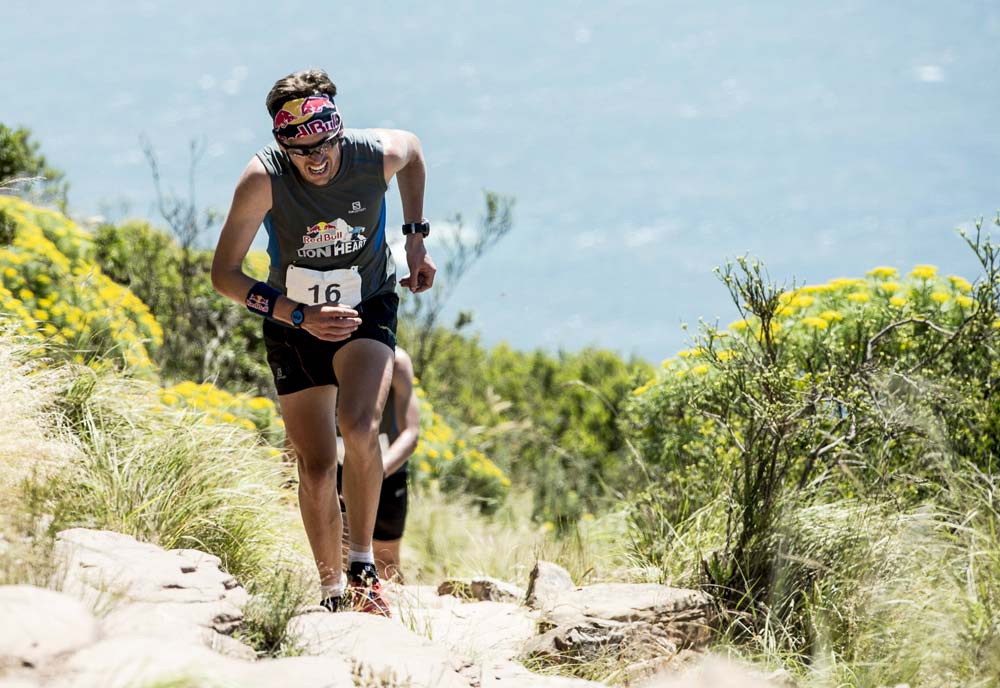
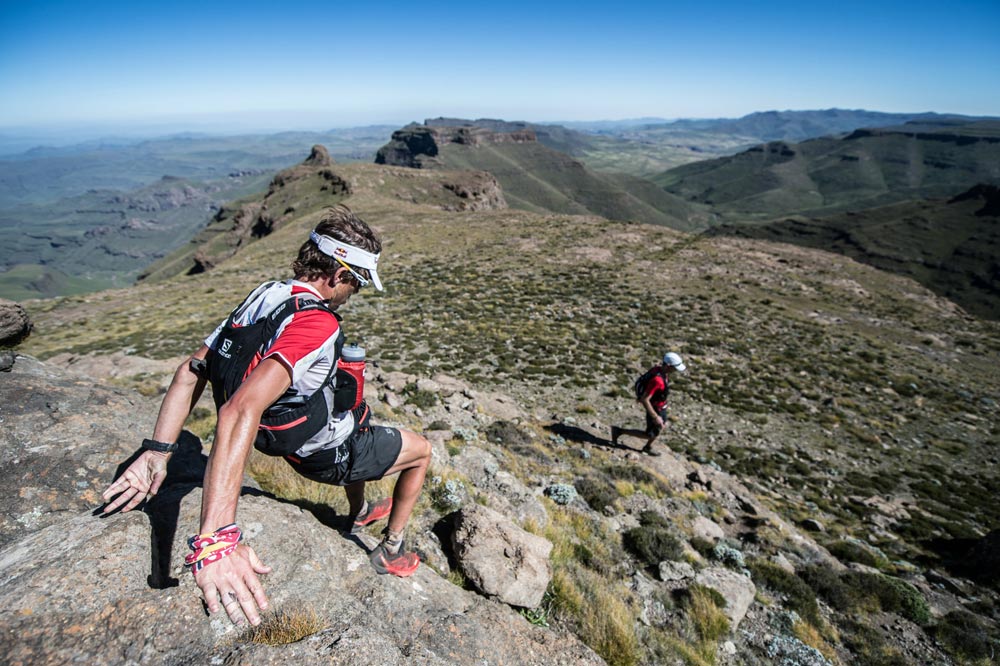
South African trail runner, Ryan Sandes, is one of the top endurance athletes in the world. In 2010, he became the first competitor to have won all four of the  desert races, each a 6/7-day, 250 km footrace through the Atacama Desert in Chile, the Gobi Desert in China, the Sahara Desert in Egypt, and Antarctica. This impressive feat won him international status. We caught up with him, briefly, and found out what makes him tick…

Is it true that your decision to become an ultra distance runner was on a ‘whim’?

Yes, I ran the Knysna marathon in 2006 on very minimal training and quite enjoyed it, so I kept on running. I never aspired to be a runner growing up so it has been a crazy journey over the past nine or so years. My first Ultra I entered was the Gobi Desert Race in 2008 and to be honest I didn’t even know where it was. The idea of running in a really remote place and the whole adventure of it appealed to me.

Were you always sporty? What was the allure of trail running specifically for you?

Yes I have always been sporty and enjoyed the outdoors. I played rugby at school and did a bit of surfing but only during my last year at University in 2006 did I discover trail running. I love the feeling of freedom trail running gives me and it has taken me on a journey to all seven continents. It is a form of meditation for me and allows me to escape the business of everyday life.

Have there been moments on tough runs that you’ve thought, “I can’t do this”? What gets you through those moments? 

Yes for sure. It’s important to stay calm and focus on the positives. I am the person that has chosen to be out there and no one is forcing me. When I am going through a tough situation I break the run down into mini goals and just focus on getting through one kilometre at a time. Mentally I find this more achievable and it helps me get through any low points in a race.
Ryan-Sandes
Do you ever find this sport lonely since often you’re running on your own?

I really enjoy running on my own so it is very rare that I get lonely. In my earlier days of racing before I met my wife, Vanessa, I used to get a bit lonely when traveling to foreign countries and being on my own the whole time. I am lucky that Vanessa now does a lot of travelling with me.

You must have seen some incredible vistas on your runs. Do you take moment to enjoy the views or are you too busy concentrating?

That’s what I love about trail running. I always try and take time to enjoy the epic scenery. It’s this kind of scenery that inspires me to run and why I love trail running so much. I have been lucky enough to run on all seven beautiful continents.

Is there one place that has stuck out as incredibly beautiful?

The Atacama Desert or Torres del Paine National Park in Patagonia, they are both incredibly beautiful. I really want to go back to Patagonia!

Tell us a little bit about your diet. We know you have to eat healthy, so what is a typical day’s food for you?

I don’t follow a very scientific or specific diet and I believe in enjoying life. I do try and eat mainly whole foods that are organically grown. I love coffee and nut butter on toast for breakfast. I tend to snack a lot on nuts and biltong during the day. I eat quite a lot of red meat and I really enjoy hamburgers. I sometimes have a bun-less burger in the evenings to cut down on carbs. I have a weakness for chocolate!
Ryans-Sandes-Climbing
Do you have a favourite treat that you indulge in?

An affogatto. A shot of coffee over some ice cream.

What is a typical day’s training for you?

It varies a lot depending on the race I am training for. I have reduced my mileage a bit over the last year as I think ultra runners tend to over do things. I run on average about 12-22 hours a week and then do some strength and mobility work on top of that. It’s important to make sure your body is moving correctly and efficiently to run your best.Ryan-Sandes
Being a professional athlete takes incredible commitment, what would you say is the best advice you could give someone that you have learnt along the way?

Never be afraid to follow your heart and dreams. You only live once so make the most of your life. It is very easy to put stuff off until another day, I would suggest doing it today. Stay patient.

Just for fun…

Dream job if you weren’t a professional athlete? Sports marketing or a trail running shoe tester … yes, some people have that job!

Last expensive thing you splashed out on? Coffee machine.

Thing you can’t be without when you travel? Phone to stay in touch and a neck pillow for long flights.

Superhero talent you’d most like to have? (We think you might have this one covered already) Be able to fly!

Sweet treat you’d pick off the dessert trolley? Gelato or ice cream … lots of it!

Photos courtesy of Red Bull

ryansandes.com | Facebook | Twitter 

Asian Huevos Rancheros on Basmati Rice

Findus Vegetables

A fun Asian spin on this typical Mexican dish. Delicious as a cosy meal on a cold winter’s eve.

Serves: 4
Difficulty: easy
Preparation time: 20 minutes
Cooking time: 25 minutes

1 Tbsp (15 ml) olive oil
½ (60 g) medium onion, finely chopped
1 tsp (5 ml) garlic, finely chopped
1 tsp (5 ml) ginger, finely grated
3 Tbsp (45 ml / 45 g) Thai green curry paste
1 Tbsp (15 ml) tomato paste
2 green chillies, kept whole
1 (400 g) tin chopped tomatoes
½ tin (200 ml) coconut milk
½ can (200 g) chickpeas, drained
1 tsp (5 ml) honey
1 tsp (5 ml) vinegar
500 g (1 bag) Findus Wok Classic
salt and pepper
4 large eggs

To Serve
Basmati rice
1 large avocado, diced
2 tsp (10 ml) sesame seeds
handful coriander leaves, chopped
handful beetroot sprouts

Heat the oil in a saucepan over medium heat. Add the onions, garlic and ginger and sauté for 2 minutes. Stir in the curry paste, tomato paste, whole chillies, chopped tomatoes, coconut milk, chickpeas, honey and vinegar. Simmer for 10 minutes. Add the Findus Wok Classic and simmer for 5 minutes. Season lightly. Carefully break in the eggs, without breaking the yolks. Cover with a lid and simmer for 6-8 minutes until the whites are set and the yolks are still soft. Discard the whole chillies.

Serve over Basmati rice and top with the avocado, sesame seeds, coriander and beetroot sprouts.

TIP: To save time, prepare everything, except for the eggs the night before. Simply heat the curry base when needed, add the eggs and cook for 6-8 minutes.

Beetroot sprouts have a beautiful colour but can easily be replaced with onion sprouts or finely chopped red onion or spring onion.


The Perfect Running Shoe: Physical Necessity or Marketing Fad?

Buying a decent running shoe ain’t what it used to be. There is such an overwhelming overload of information out there, compounded by ever-changing trends: minimalist, anti-pronation, trail, road or hybrid… how are we supposed to know what it right for us? Or is it all just marketing hype? I spent some time with local specialists to find out.
RUN_store
The Running Shoe Aficionado

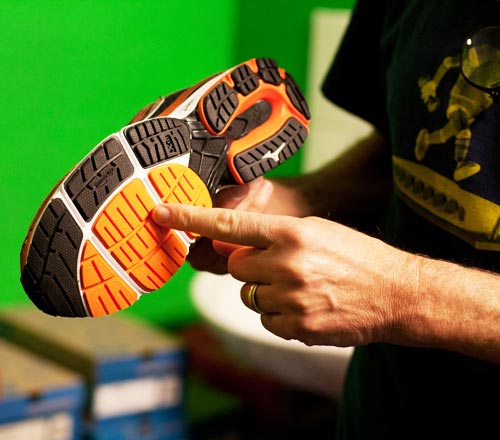
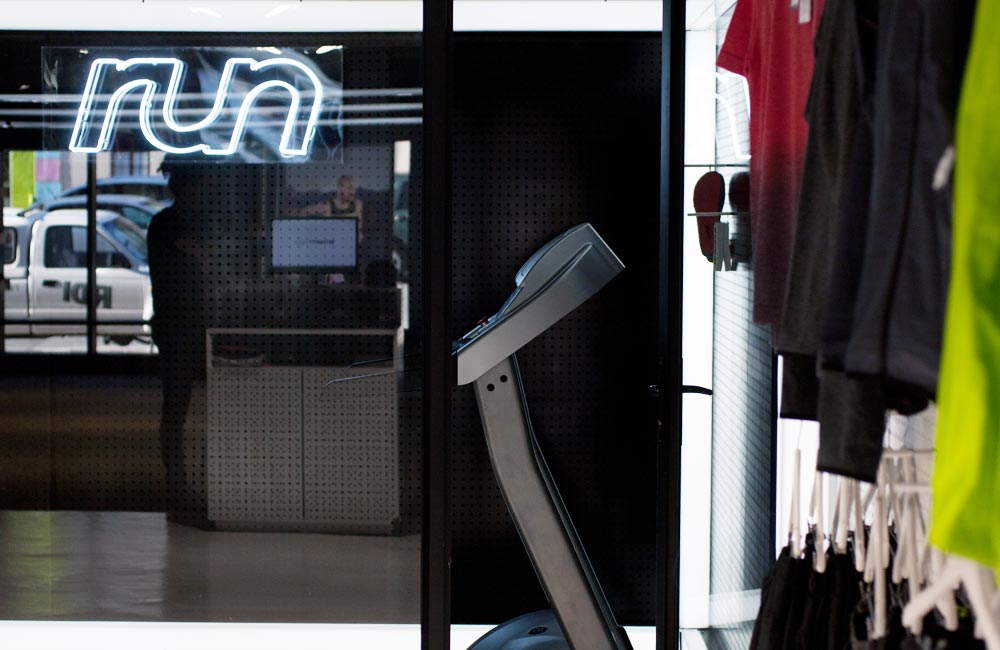
It’s unlikely you’ll find anyone who knows more about running shoes than Grant Bryant. After 12 years in the industry, Grant is now the owner of RUN Specialist Store in Cape Town, home to a vibrant community of pro-runners, sports scientists and some of the most beautiful running shoes I have ever seen.

But RUN is not just about aesthetics. Grant is a veritable fountain of knowledge, as are his trusty sidekicks. The team works closely with physiotherapists, podiatrists and other specialists, and their enthusiasm is as impressive as their practicality.

“You can’t prescribe a shoe as a cure,” says Grant. “The right shoe can assist with and support the treatment of an ailment, but there are multiple determining factors – your lifestyle, history, bodyweight, how often you train and what exercise you do. A super fit 45 kg pro-marathon runner who pronates severely will likely need far less support than an overweight weekend warrior with a very mild pronation.”

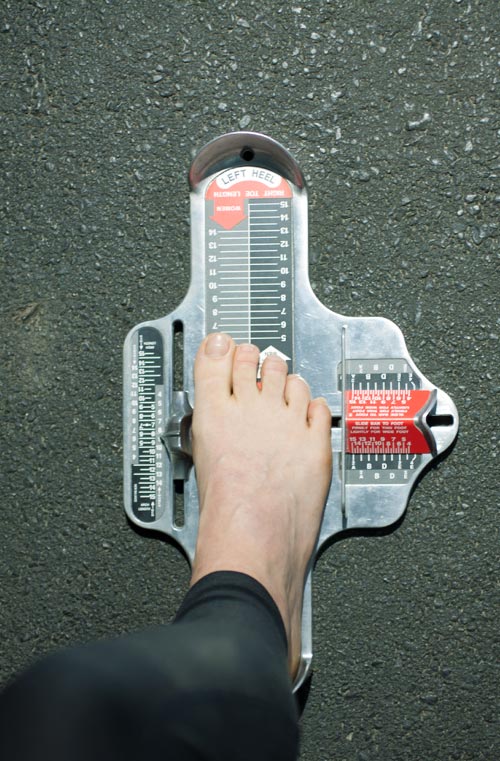
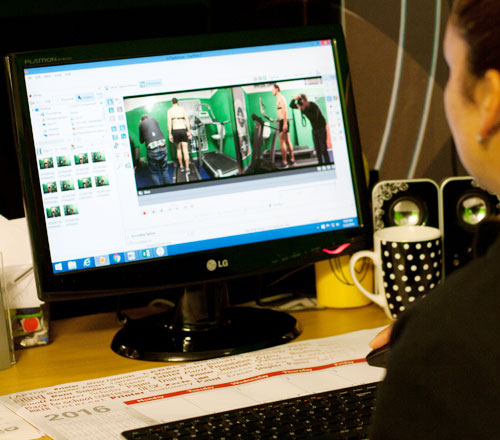
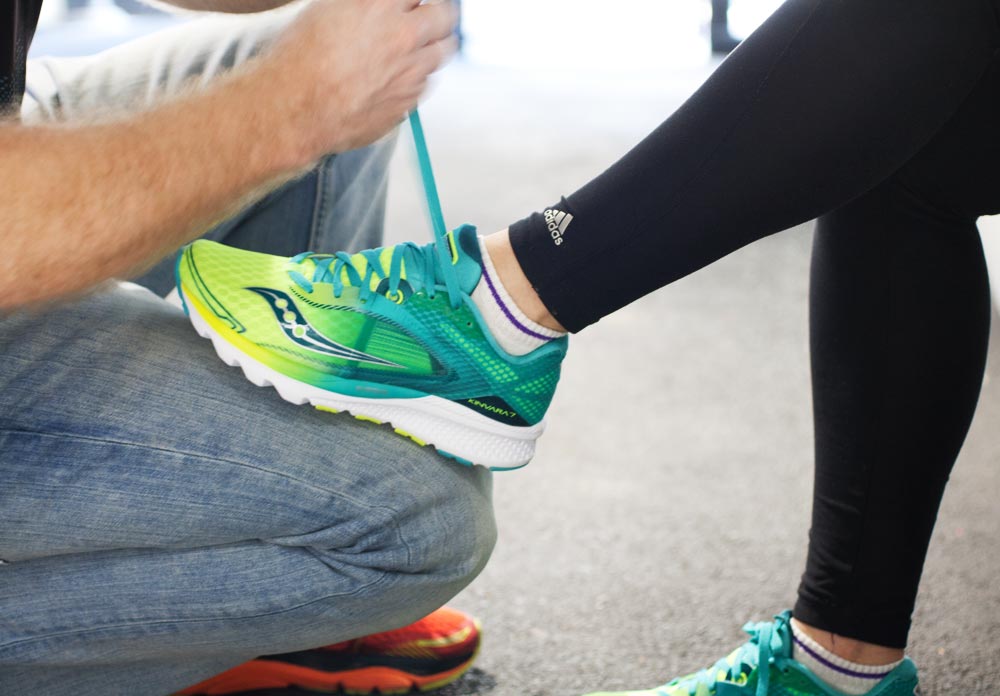
 Before recommending a shoe for me, the RUN team measure my feet with a Brannock device and then film me as I run on a treadmill. Afterwards, we watch a slow motion video and Grant talks me through his various insights, recommending a shoe type that fits my needs.

Which brings me to an interesting fact: About 80% of the shoes in RUN are neutral. At your average sports store, the reverse is often true. In my experience, most women’s shoes at local, big-chain stores provide anti-pronation support. “There are a lot of old school beliefs and misconceptions out there,” says Grant. “Anti-pronation shoes tend to be over-prescribed and unnecessary.”

According to Grant, Asics remains the dominant brand for your average South African runner. “They are reliable and consistent,” he says. “Brands like Nike or Adidas invest considerably in innovation, which means their products change often. Asics are not prone to fads – they didn’t even produce a minimalist shoe during the ubiquitous barefoot phase. With Asics, you know what you’re getting.”

RUN Specialist Store

The Podiatrist
carlo_running
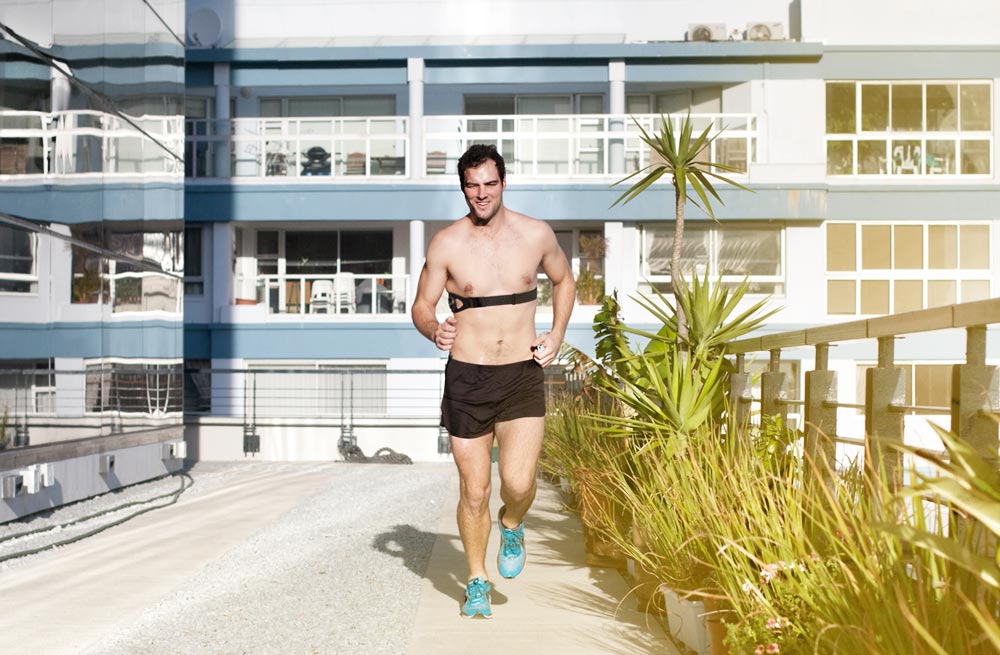
Carlo Longano’s running lab at the Biomechanics Institute is a sight to behold, a laboratory of gismos, gadgets and complex machinery. But Carlo, an esteemed and outspoken local podiatrist, is not in the business of selling shoes. I ask him frankly: “How detrimental is it really to run in the ‘incorrect shoe’? Our predecessors were fine with nothing, are we not being a little… well… over the top?”

Carlo laughs. “You can’t prescribe a Palaeolithic lifestyle to someone who sits at a desk all day. That said, you should aim to remain as close as possible to your natural biomechanics. For example, excessively soft and supportive shoes can be detrimental to your muscle function, because the shoe does most of the work and as a result certain muscles can deteriorate and weaken.”

Carlo explains to me how an incorrect shoe can cause defects in your running, throwing out your alignment and leading to injury. Ideally, runners should invest upfront in having their gait and stance analysed and the correct shoes fitted. “Perhaps the process is expensive initially,” says Carlo, “But the cost of an injury will inevitably exceed the cost of prevention. I get so many patients coming in with injuries that could’ve been prevented from the start.”

Carlo takes me through the parameters required to asses which shoe would work best for a particular individual. The process is lengthy and incredibly detailed, and includes an array of measurements and methods, including Surface Electromyography (SEMG), video analysis, muscle function tests and, if necessary, x-rays.

“We want to move clients away from the myth of the brand and towards a scientific truth,” he says. “When it comes to shoes we don’t go by manufacturer or fad. We go by science and body mechanics.”

 The Biomechanics Institute 

The Biokineticist

Neil Hopkins is the gold standard in Biokinetics – young and smart enough to be at the cutting edge of research and innovation, experienced enough to run a substantial and varied practice. In an hour with Neil, he is likely to cite more academic papers than a university professor. As someone who works closely with injured patients aiming to get back into their running shoes, I decide to spend a morning with him to find out how much the ‘right’ running shoe really matters.
Running_shoes
“Ideally, we aim to get the body correct as much as possible first, rather than relying on a shoe to solve a problem,” he says. “Conjunctive therapy is the most viable solution – a combination of prescribed exercises together with a correctly fitted shoe or insert. Although each individual is obviously treated on a case-by-case basis, and re-assessed over time.”

Neil explains how there is no formulaic, one-solution-fits-all prescription when it comes to buying the right shoe. The entire body needs to be taken into account. Yes, you might spend thousands on a great pair of shoes to support you through the rehabilitation of an injury, but are you working the correct muscle groups? What about your posture and alignment? From Neil, I gain a deeper understanding of the full chain of effect: How our foot mechanics are not determined by our shoes, but rather by our entire body. How we can make incremental changes to those mechanics through correct exercise and movement.

“There is a lot of anxiety for clients,” says Neil. “They have an issue, they ask Dr Google for answers, and the sheer magnitude of information available is overwhelming for them.”

Neil suggests approaching a shoe purchase like a scientist: start with a hypothesis, but be open to disproving it based on evidence. Notice if there is an increase or decrease of pain, observe your body’s movements. Awareness is key.

“Remember at the end of the day it is a subjective appraisal from the professional that is assisting you with what shoe to wear,” says Neil. “You still need to add in your own subjective appraisal to ensure the best fit. Don’t dumb down your own ability to listen to your body and take your own personal evidence into account.”

Neil Hopkins Biokinetics – Gardens Virgin Active

See our chat with Ultra Marathon runner Ryan Sandes

Reliance Rolls Out Waste to Energy Project

Reliance Compost
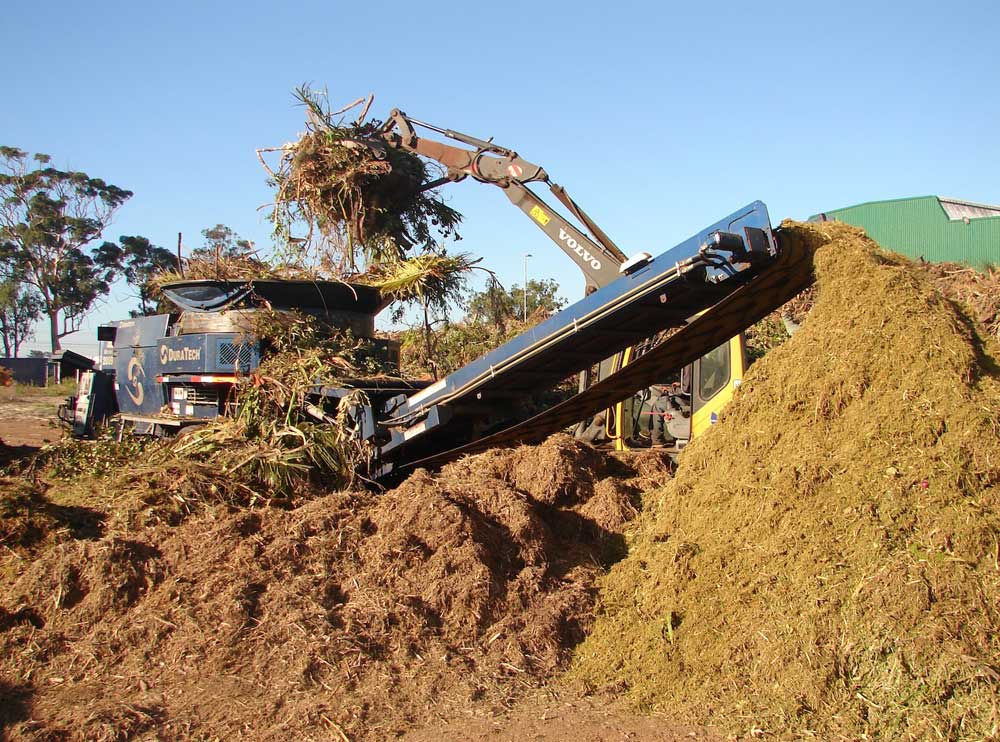
Reliance, the leading organic compost provider in the Western Cape are excited to have received the green light for the R250 million Waste to Energy project at Corona Farm in the Paarl region. The project will not only generate energy from organic waste, but it will directly and indirectly create over 1000 jobs, save landfill space and carbon emissions, as well as see depleted agricultural soils being rebuilt to high humus soils. Those are some serious wins!
Reliance-Waste-to-Energy
After re-zoning is finalised Corona farm will be divided into eleven units. One unit for the Waste to Energy project and ten units to new sustainable organic farms, with the focus on ownership for young entrepreneurs, primarily from previously disadvantaged backgrounds. Three of these units have already been developed with plantings of table and wine grapes, as well as citrus and the nursery. An additional two units are in the process of being planted.

Reliance has already started their in-house training process consisting of five new entrepreneurs and ten interns. Furthermore Reliance has combined efforts with Skills Fusion and the Department of Agriculture in training fifteen new agriculture students over the next 12 months.
Reliance-Waste-to-Energy
Mieke Willis, Marketing Manager for Reliance, states that the company’s mission is to Grow Greener Generations, and these new initiatives can be seen as a reflection of the company ethos. Reliance starts investing at Primary school level, carrying forward the message that every child/individual can dream and make that dream a reality if they are committed to making South Africa a better place for generations to come.

Reliance plans to expand operations into the Southern and Eastern Cape in the near future.

Delicious produce is grown in healthy, living soil. #Harvesttotable series brought to you by Reliance Compost.

Reliance Compost

Featured Brew: Dancing with Darling’s Blood Serpent

Darling Brew is roughly a year or so into their new brewery and they’re are on fire. You would think they’d ease into the whole thing and tinker here or there, but that couldn’t be further from the truth. Darling Brew is roaring like a V8 muscle car and their fearless driver is German brewmaster, Felix. He’s pushed Darling to the limit this year with interesting brews and ideas. His latest offering is Blood Serpent – a dry hopped lager.

Inspired by the ferocious snake-hunting secretary bird, Blood Serpent is South Africa’s first carbon neutral beer. What this means is that all the CO2 emissions from the production and distribution of the beer, are offset by Darling’s contributions to the Kariba Redd+ Project in Zimbabwe. Pretty cool hey? It not only makes you feel good with it’s 5% ABV, it also does good in the process.
Darling_Brew_blood_serpent
The lager is unfiltered and it has a light amber colour. It swoops in with floral and honey aromas with a spicy, hoppy background. The dry hop used in this brew is Hallertauer Mittelfrüh and no prizes for guessing it comes from Germany. It’s one of the noble hops, which means it’s one of the traditional European varieties. On the palate the beer hits with a cut grass hoppiness and a hint of floral fruitiness. Shortly after the malt backbone kicks in to round things out. On the finish you’re left with a pleasant and spicy 32 IBUs and a thirst for the next sip.

Fun Fact…

Just how badass is the secretary bird? It’s been known to hunt and kill small gazelles.

Blood Serpent is Darling’s third lager and I’ve got to say it’s by far the most exciting. It’s interesting, delicious and just look at that awesome label. Top marks Darling, we can’t wait to see what you brew next.

Kariba Redd+ | darlingbrew.co.za | Facebook | Twitter | Instagram

Beer, Steak & Kuier at Wild Clover

We’re not sure what made us feel more welcome on our recent visit to one of our favourite places, Wild Clover Brewery. It may have been the massive hug and handshake from half-boer-half-viking-looking owner and brewmaster, Ampie Kruger. Or it might have been the pints of delicious Double Owl that welcomed us. Either way, we were happy to be there, we were hungry, and ready to put a dent in the BIG Steak & Beer Dine-Out.
Wild-Clover Brewery
Wild Clover have put in some serious effort to crank their branding, beers and their Stellenbosch home up a few notches. Some great design work means the beers look world class, and the brews inside the bottles deliver on the promise of the premium packaging.

With the new brewery working foot-flat, the beers are better than ever. We tasted every one just to be sure and the results were smiling faces and empty glasses. As well as the new shiney brewery, they’ve also built a kick-ass tasting room and restaurant. The interior is modern and beautifully designed, and there’s even space for live music. Outside they’ve built the perfect setting to watch the sunset over the Cape Winelands, complete with a massive fire pit.

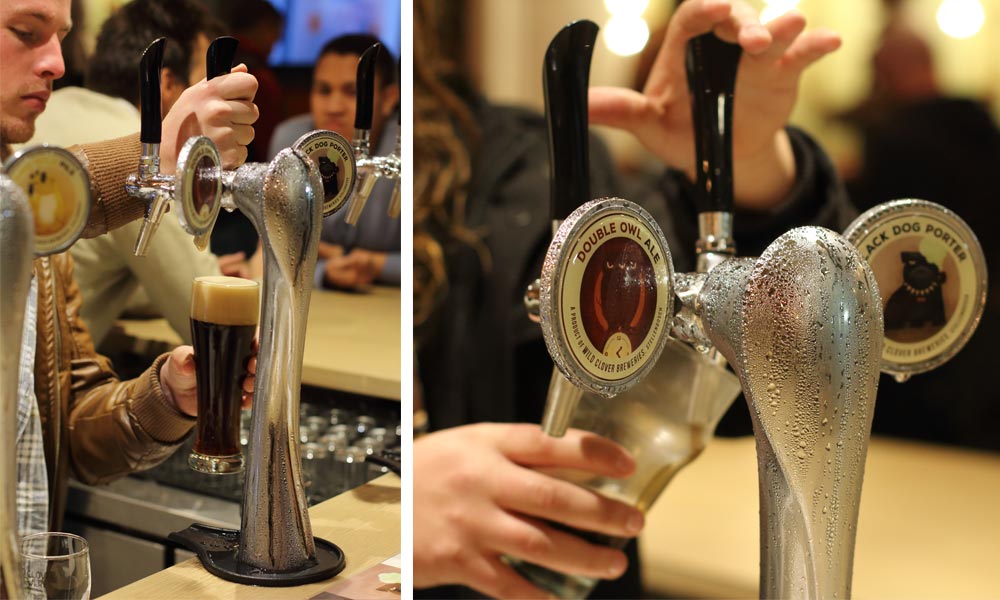
We started our evening with tasters of the Eagle Weiss and Blind Mole pilsner. Even though it was a chilly night on the farm, these summertime brews went down a treat. The Eagle Weiss is an unfiltered wit beer that’s brewed as a lager. The result is a crisp yet fruity ale that’s seriously refreshing and lekker. The pilsner is a fruity unfiltered lager with a honey-like character, as well as spicy and floral notes from the Saaz hop. It’s a crowd pleaser that’s perfect for those long, lazy summer days. From there we moved onto one of our favourite Wild Clover beers, Double Owl. It’s a traditional brown ale with a malt-forward nuttiness and a warm citrus kick. We had more than a few of them and we can safely say they paired perfectly with the roaring fires outside.

Wild-clover-Steak-Night-Greg
Back inside the tasting room and the smell of steak and chips was beginning to fill the air. Wild Clover are trying out a new concept in dining that is easy-going and friendly – a lot like their beers. You buy tickets online and order your meal at the same time.
The size of your steak, how you want it cooked, and any sauces you want with it is all taken care of when you pre-order. Say what you want but there is something refreshing about not having to slog through a fifteen page menu. The idea is that you know exactly what you are getting before you get it, which gives you plenty of time to focus on the beers.
As we waited on our steaks we decided it was time for a few Black Dog porters. This beer is a tribute to Zack, the faithful hound belonging to the other half of Wild Clover, Karel – what an epic way to immortalise a legend. If Zack was a dark, brooding, cigar-smoking canine with a strong bite and a fireside kick, then they got it spot on. It is definitely our other favourite Wild Clover beer and it paired perfectly with the meal of the night.Wild-Clover Brewery
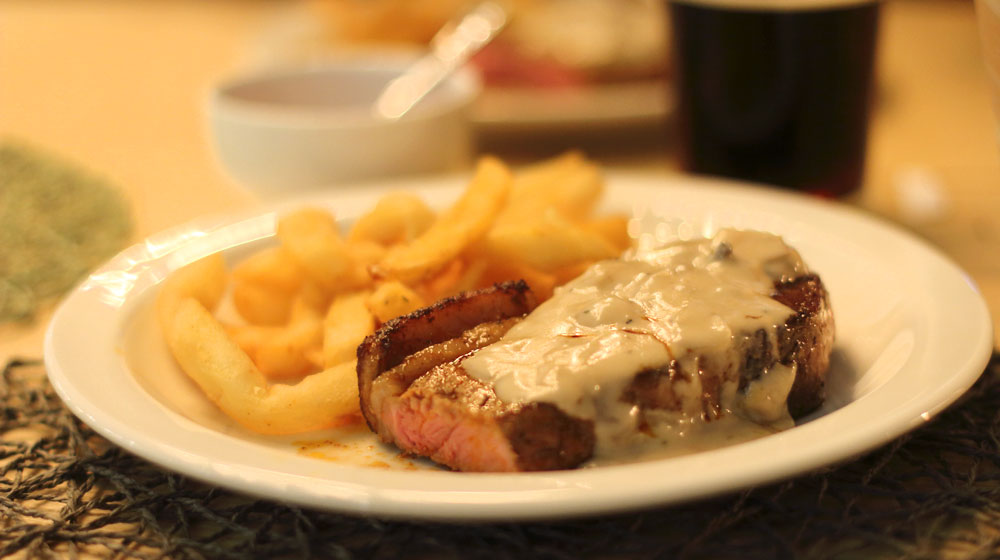
Dinner was a 300 g sirloin cooked medium-rare with a creamy mushroom sauce, and a big pile of chips. No more, no less, just what the doctor ordered (the doctor of what we ain’t sure). We usually prefer our slabs of meat cooked over the coals, but a smoking hot cast-iron grill comes in a very close second. The steaks were well caramelised, beautifully cooked, and they went down like a homesick Blind Mole.

Wild-Clover Brewery
The evening was a roaring success and we love what Wild Clover is doing. The approach is no frills way of dining out and you get exactly what you order. There is no pretense and no space for chips-on-shoulders, finicky changes or picky requests. When you are at Wild Clover, you are part of the family. There are no waiters or waitresses and everyone who works there gets stuck in. The food comes out as it’s ready and you get your own drinks from the bar.
Wild-Clover Brewery
It really is a jovial atmosphere and the only thing louder than the live music is the laughter. These are not amateurs, this is pro-level kuiering of the highest order. If you leave not having had a blast, it’s no one’s fault but your own. We can’t wait for the next one!

Our First Capital Craft Beer Fest

Now that the dust has finally settled and we’re somewhat recovered from our Jozi trip hangover, it’s time to talk Capital Craft Beer Fest. So what’s the verdict? A big hell yes combined with a @Kleurlingbierman inspired, “Jiiiiiiiiiiiiiiireeee!”. That’s right Capital Craft Beer Fest was epic and it’s easily one of the best beer festivals we’ve ever been to.

From the moment we arrived – which was admittedly a little late and with a massive rookie mistake hangover – we knew we were in for a treat. The festival was absolutely heaving and by heaving I mean 7000+ tickets were sold. That’s one thing you have to give to the Jozi and Pretoria crowds, when there’s an event they are there to support. Us Capetonians could definitely learn a thing or two from them.
Capital-Craft
african-beer-emporium
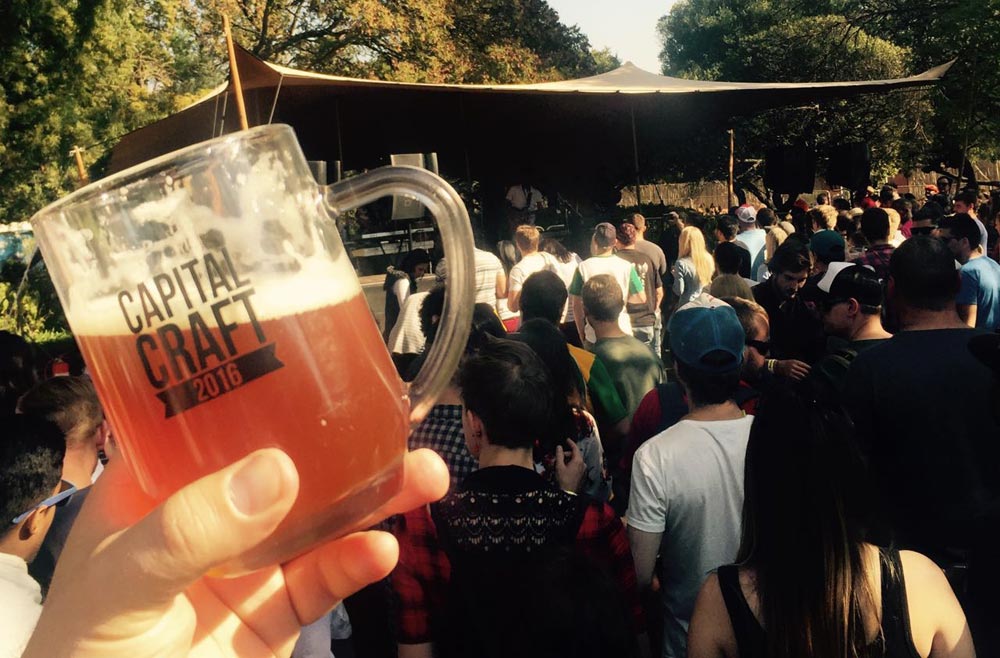
Even with the the big crowd the fest was a smooth as a nitro stout. We waited all of two minutes to get in and we were pleasantly surprised to receive a proper festival beer mug. The mug comes as part of your ticket price, which was a very reasonable R150. Most festivals these days give you a plastic cup with the option to buy a glass. Mugs in hand we set off to find some beer.

Before we could get into our first beer we were met by one Greg Casey of Banana Jam Cafe. He promptly whisked us off to the Anvil Ale House stand and told us that he’d found the beer of the festival. He warned that it was going to ruin us for the rest of the festival but how can you say no to an offer like that? What followed was Anvil’s Mjolnir West Coast IPA and Greg was right. It was ridiculously good. Easily the best IPA to ever come out of the north and on par with Cape Town’s best.

With our palates shocked into an alert state we moved on and what we found was incredible. We tasted Two Okes spicy butternut porter and their imperial stout. We smashed a clean and earthy IPA from Copperlake. We savoured a Stimela amber. We sipped on a bergamot tea IPA from Standeaven. We sampled Jack Black’s new weiss and a new pale ale from Striped Horse. We drank a couple of Darling’s Blood Serpent and sampled a range of tasty beers from too many brewers to name. The fest provided us with the best the country had to offer and we weren’t disappointed.
stimela-capital-craft
Along with all the tasting came great conversation. We chatted with brewers, bloggers, beer lovers and everything in between. There seemed be a beer electricity in the air, an excitement that I’ve not felt at many festivals. It sounds weird to say but it genuinely felt like a festival – halfway between a music festival and a beer fest. Not just a beer fest with some musical acts. There were three stages with music all day and the botanical gardens setting, meant you had to wander through trees to find different sections of the fest.
Friars-Habit-Capital-Craft
Usually at an event of this size you’d expect to queue for everything. Other than the toilets, which was a sort shuffling queue, we didn’t wait long for anything. There was also plenty of picnic space in the gardens and loads of hay bails to rest on. All in all we have to say that Capital Craft Beer Fest was incredible. We can’t wait to head back next year and do it all over again. To Capital Craft we give a big beer soaked high five. We’d also like to give a shout out to Craft Nation, Craft Geek, Hops on Hops off, Holger Meier and Kleurling Bierman our fest would not have been the same without you guys. Lastly a big thanks all the brewers and until next year, cheers!
riot-capital-craft
capitalcraft.co.za